

PE-Design 11.40 Embroidery Software Full Version Lifetime – Professional Digitizing
0,00 $
PE-DESIGN 11.40 embroidery digitizing software for lettering, design editing and photo-based embroidery workflows.
- Listed offer: one-time payment and lifetime activation.
- Download delivery with installation guidance and remote setup.
- Check computer and machine compatibility before ordering.
- Confirm the supplied licensing components, including whether the Brother USB software key is included.
PE-DESIGN 11.40 is the version listed in this Needlic offer for embroidery digitizing, lettering and design editing. Use this guide to understand the PE-DESIGN 11 tools, prepare your computer and check how designs will reach your embroidery machine.
The listed offer includes a one-time payment, lifetime activation, digital delivery and installation guidance or remote setup. Before ordering, confirm the supplied package and licensing components with Needlic, including whether a genuine Brother PE-DESIGN Software Key is included. Brother’s documented retail installation uses this USB key; digital delivery alone does not establish that it is supplied.
What can you create with PE-DESIGN 11?
Choose a project before choosing a workflow. A name added to an existing design, a newly digitized logo and a photograph converted into stitches need different preparation. Start with the final dimensions and fabric, then decide which tools you need.
- Lettering and reusable designs: Brother lists 130 built-in fonts and more than 1,000 designs, with font filtering to help find suitable lettering.
- Photo-based embroidery: PhotoStitch, Auto Punch and Cross Stitch wizards provide different ways to turn source artwork into embroidery.
- Thread-change planning: Intelligent Color Sort groups areas that share a color to reduce changes.
- Fabric settings: Fabric Selector adjusts sewing attributes for the selected fabric.
- Cutting workflows: FCM import and export connects suitable designs with ScanNCut and CanvasWorkspace.
These are features documented for the PE-DESIGN 11 product family. Confirm the supplied build and machine-specific functions before purchase; this listing is for 11.40, not a promise of every feature in a later update.
A practical workflow for your first project
- Define the finished result. Write down the design width and height, hoop size and intended material. For a logo, identify the smallest letters and narrowest shapes before starting.
- Prepare the source. Keep a clean original copy. Simplify unnecessary background detail and decide which elements must remain separate.
- Choose the conversion method. Compare the available wizard output with the result you need. Automatic conversion is a starting point that still needs inspection.
- Review the design. Check overlapping areas, stitch order, color changes and lettering at the final size. Do not judge the result only from a zoomed-in preview.
- Transfer and test. Use the format and transfer method accepted by your exact machine. Stitch a sample on the planned fabric and stabilizer before committing to a batch.
Computer requirements and installation preparation
Brother’s published PE-DESIGN 11 requirements include Windows 10 or 11, a processor of at least 1 GHz, 1 GB RAM, 600 MB free disk space and a 1024 × 768 display or higher. Its documented setup calls for two or more USB ports for the software key and embroidery-data transfer. Internet access is needed for installer downloads and updates.
These published minimums are not a performance guarantee for every project. Before remote installation, send your Windows version and computer specifications to Needlic, back up existing designs and confirm which components the offer supplies. Do not assume that buying this version includes future updates or a native macOS application.
Machine compatibility: check the transfer method
A machine’s brand name is not enough to confirm the complete workflow. Identify its exact model, supported design format, hoop limits and whether it accepts USB media, a computer connection or wireless transfer.
Brother documents wireless transfer for supported machines, including Luminaire XP1, XP2 and XP3. This should not be read as wireless support for every embroidery machine. Confirm the machine and software build together before relying on that feature.
Installation support and package checklist
Needlic’s existing offer includes download access after payment, step-by-step guidance and remote installation support when needed. Before checkout, confirm:
- The version and build being delivered.
- The activation method and whether the required Brother software key is supplied.
- The number of computers covered and any transfer restrictions.
- The installation appointment or self-installation instructions.
- The scope of support and whether any updates are included.
Contact Needlic with this product link and your computer and machine details if any package component is unclear.
Frequently asked questions
What is the difference between PE-DESIGN 11 and 11.40?
PE-DESIGN 11 identifies the software generation; 11.40 identifies the version advertised in this offer. Check the installed build rather than assuming that this listing supplies the newest available update.
Does the official software require a USB key?
Yes. Brother’s installation instructions use the PE-DESIGN Software Key, and its manual states that the key must be connected to use PE-DESIGN 11. Confirm whether this component is included in the Needlic package before payment.
Can PhotoStitch produce a finished design without testing?
Review the generated design and stitch a sample. The final dimensions, source image and intended fabric matter; an attractive screen preview alone does not establish the finished stitch quality.
Can I send designs wirelessly to any machine?
No universal wireless compatibility is promised. Check your exact machine model, network setup and software build. Machines without a supported wireless workflow may require another transfer method.
Is remote installation included?
The listed Needlic offer includes installation guidance and remote setup if needed. Confirm the computer requirements and package components before scheduling installation.
Compare related embroidery software
Use our embroidery software buying guide to compare editing, lettering and digitizing needs. You can also review the separate Hatch Embroidery 2 and Wilcom e4 offers. Compare exact editions and package contents rather than assuming equal features or licensing.
Official product references
Only logged in customers who have purchased this product may leave a review.
Related products
Embroidery Software
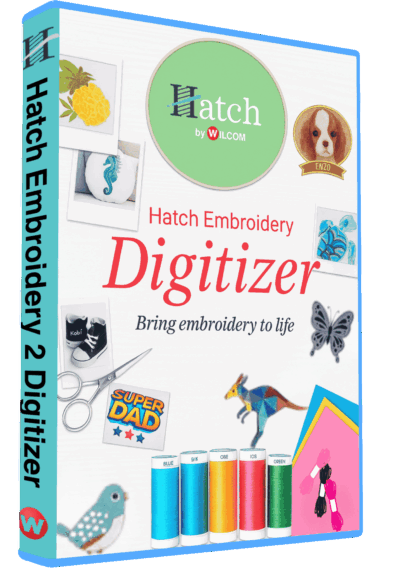
Hatch Embroidery 2 Professional Digitizing Software – 1 Key per PC Lifetime License
Embroidery Software
Tajima DGML 16 Pulse Embroidery Software Full Version Lifetime – Instant Download
Embroidery Software
Bravo Amaya OS 12.06.42 Full Version Lifetime – Embroidery Machine Software
Embroidery Software
Embroidery Software
Melco DesignShop 11.3 Pro Embroidery Software Full Version Lifetime – Instant Download
Embroidery Software
Embroidery Software
DesignShop V9 Professional Embroidery Software Full Version Lifetime – Instant Download
Embroidery Software
Tajima DG17 by Pulse – Embroidery Digitizing Software – 1 Key Activation For Lifetime
Reviews
There are no reviews yet.