
RIP Software
Wasatch SoftRIP Review for Beginners

Mar
Struggling to produce professional prints without a steep learning curve? Wasatch SoftRIP emerges as a game-changer for beginners in wide-format printing.
This review explores its intuitive features, straightforward installation, user-friendly interface, essential RIP functions like color management, workflow setup, pitfalls to avoid, and pricing details.
Discover why it’s the ideal entry point into RIP software excellence.
Key Beginner-Friendly Features
SoftRIP’s Setup Wizard completes printer configuration in under 10 minutes, automatically detecting Epson, Canon, Roland, and HP models with 50+ pre-loaded ICC profiles. This auto setup wizard stands out against manual Onyx config, saving hours of trial and error for new users in wide format printing.
Drag-and-drop hot folders simplify job submission. Drop files like PDFs or TIFFs into folders, and Wasatch SoftRIP processes them automatically, ideal for batch printing banners without constant monitoring.
The visual queue preview shows jobs in real-time with color-accurate thumbnails. Beginners can spot issues like nesting errors before printing, streamlining the print workflow on inkjet printer RIP systems.
- 20+ tutorial videos in Wasatch Academy cover basics like color management and media profiles.
- One-click linearization calibrates ink limits quickly, ensuring consistent output quality for dye sublimation or UV printing.
| Feature | SoftRIP | Onyx | Caldera |
|---|---|---|---|
| Setup Wizard | Yes | No | Partial |
| Drag-and-Drop Hot Folders | Yes | Yes | Yes |
| Visual Queue Preview | Yes | Partial | Yes |
| Tutorial Videos | 20+ | Limited | Few |
| One-Click Linearization | Yes | Manual | Partial |
These RIP features make Wasatch SoftRIP a top choice in this SoftRIP review for beginners. Compare it to Onyx RIP or Caldera RIP, and the ease of use shines in user interface and installation guide aspects.
System Requirements
Minimum: Windows 10 64-bit, Intel i5, 16GB RAM, 500GB SSD for smooth processing of 64″ wide-format jobs. These specs ensure Wasatch SoftRIP handles raster image processing without lag. Beginners should verify their setup matches these basics before installation.
A real-world example shows an Epson F170 handles 300 DPI banners with 16GB RAM but crashes on 8GB during heavy jobs. Upgrading RAM improves print workflow reliability for inkjet printers like Epson or Roland models. This setup supports color management and queue management effectively.
| Requirement | Minimum | Recommended | Notes |
|---|---|---|---|
| OS | Windows 10 64-bit | Windows 11 64-bit or macOS Ventura | Windows required; macOS optional for advanced users |
| CPU | Intel i5 | Intel i7 or equivalent | Multi-core for faster RIP processing |
| RAM | 16GB | 32GB | Essential for large files and nesting |
| GPU | Integrated | NVIDIA GTX 1650 or better | Boosts preview speed in user interface |
| Storage | 500GB SSD | 1TB SSD | Space for ICC profiles and job queues |
The 500MB installer for the demo version downloads easily from wasatch.com. Test compatibility on your hardware during the free trial to avoid issues with wide format printing. For Canon or HP printers, recommended specs enhance tiling and cut contour features.
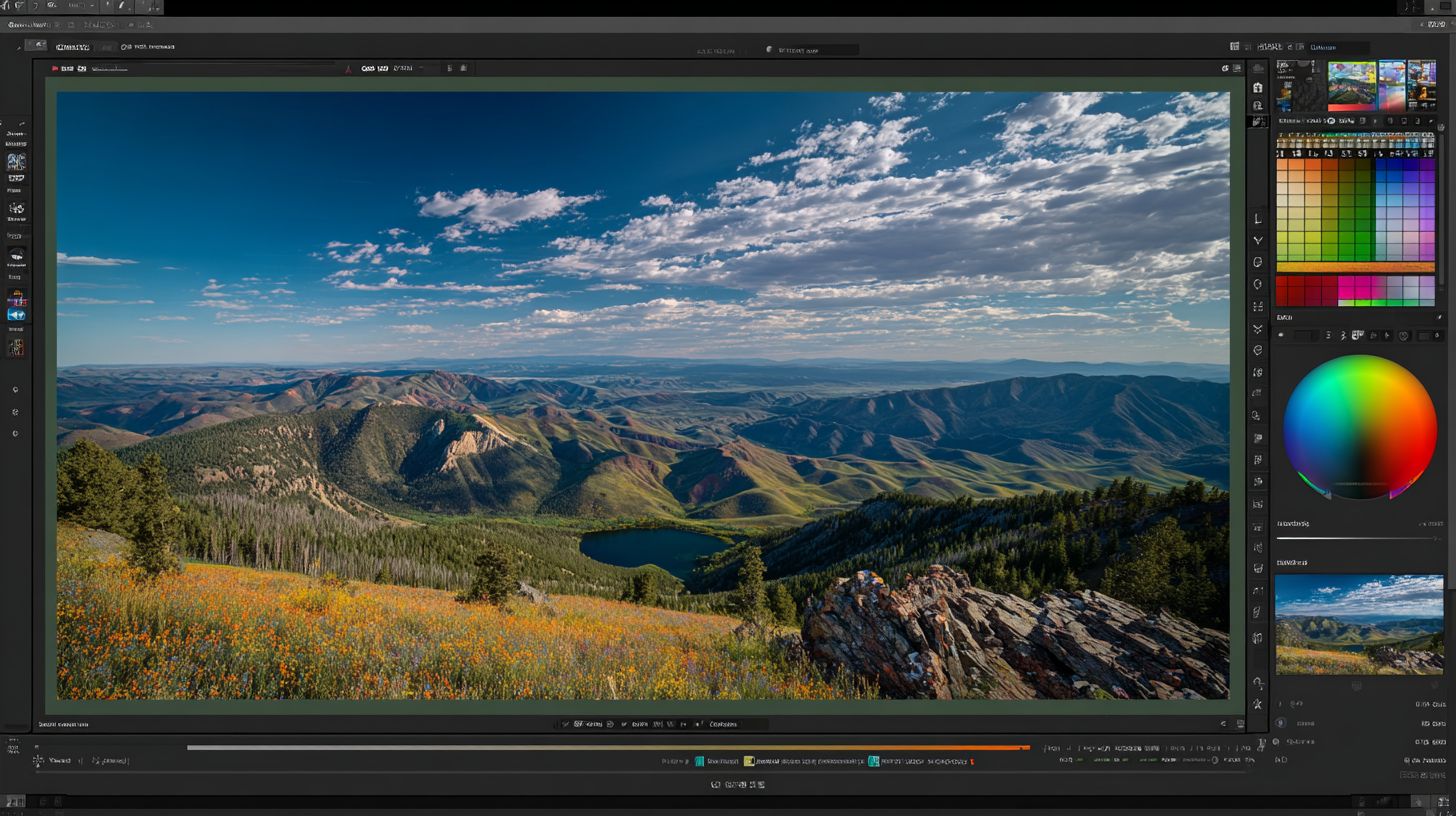
Dashboard Navigation
The main Queue tab shows real-time job status with color-coded progress bars and drag-to-reprioritize functionality. Beginners find this print queue intuitive for managing multiple print jobs in Wasatch SoftRIP. It supports file formats like PDF and EPS for smooth job submission.
Follow this numbered guide to navigate the user interface effectively. Start with the top toolbar featuring a Submit Job button, shown in the screenshot as a prominent icon next to PDF/EPS upload options. The bottom panel displays Active Jobs x5 preview with thumbnails for quick monitoring.
- Queue tab: Handle job submission and track progress with drag-and-drop reordering for queue management.
- Media Manager: Access 150+ profiles for Epson, Canon, Roland, and HP printers to set up media profiles quickly.
- Color Lab: Edit ICC profiles for precise color management and linearization adjustments.
- Tools menu: Use nesting and tiling features to optimize materials in wide format printing.
- Hot Folder setup: Configure in three clicks for automated hot folders and hands-free workflow.
For beginners, practice on the Queue tab first with a simple TIFF processing job to learn drag-to-reprioritize. This RIP software dashboard reduces the learning curve in print workflows. Explore Media Manager next for custom profiles tailored to your inkjet printer RIP needs.
Color Management Basics
SoftRIP includes 500+ factory ICC profiles for Epson SureColor, Roland, and Canon printers with automatic ink limiting (max 140%). This setup helps beginners handle color management in wide format printing without guesswork. It ensures consistent results across inkjet printers right from installation.
The color workflow in Wasatch SoftRIP follows four key steps for reliable output. First, select the input ICC profile like sRGB for web graphics or Adobe RGB for photo editing files. This matches the source color space accurately.
Next, choose the printer ICC profile from the library or create a custom one. Then perform a linearization scan, a quick 5-minute process using test prints to calibrate ink density. Finally, use the output preview to check colors before ripping and printing.
This workflow supports formats like PDF/X-4, EPS3, and TIFF 16-bit. For example, load a PDF/X-4 banner design and watch SoftRIP apply profiles automatically. Beginners find the user interface intuitive for these steps in the print queue.
- Input ICC: Assign sRGB or Adobe RGB to incoming files.
- Printer ICC: Pick from 500+ profiles for Epson, Roland, Canon.
- Linearization scan: Print and scan a strip in 5 minutes for precision.
- Output preview: Simulate final print to spot issues early.
Experts recommend this process for color correction in RIP software. It simplifies print workflow for sign making and photo printing, reducing trial prints for beginners.
What is Wasatch SoftRIP?
Wasatch SoftRIP is a professional raster image processor (RIP) software designed for wide-format inkjet printers from Epson, Canon, Roland, and HP, transforming complex files into high-quality print-ready data. A RIP software like this processes files such as PDF, EPS, and TIFF into raster images optimized for printing. It handles tasks that basic printer drivers cannot manage effectively.
Common use cases include preparing files for banners, vinyl graphics, dye sublimation, and UV printing. For example, it converts a design file into precise bitmap data that ensures accurate colors and sharp details on large-format outputs. Beginners appreciate its ability to streamline workflows for sign making and poster production.
Wasatch SoftRIP supports popular models like the Epson SureColor S80600, Roland VersaCAMM, and Canon Arizona series. Unlike standard printer drivers, which often lack advanced features, SoftRIP offers color correction, nesting, and cut contour generation. This makes it ideal for vinyl cutting and direct-to-garment printing.
Compared to basic drivers, SoftRIP provides superior color management with ICC profiles and linearization tools. Drivers might produce inconsistent results across media types, but SoftRIP ensures reliable output quality. For a beginners guide to RIP software, starting with its queue management and hot folders simplifies job submission.
Why Choose SoftRIP for Beginners?
Wasatch SoftRIP stands out for beginners with its intuitive setup wizard and pre-configured media profiles for popular printers like Epson and Roland. Unlike Onyx RIP, which has a steep learning curve with complex menus, SoftRIP offers a gentler introduction to RIP software. AcroRIP often lacks robust support and updates, making it less reliable for new users in wide format printing.
Beginners appreciate the user-friendly interface that simplifies print workflows from job submission to output. The software includes tutorial for beginners and clear documentation, reducing setup time. This contrasts with competitors like Onyx RIP, where advanced features overwhelm novices.
Practical advantages include hot folders for easy file processing and color management tools that handle ICC profiles without deep expertise. Users report smoother experiences with queue management compared to AcroRIP’s limited options. SoftRIP’s free trial lets beginners test compatibility with their inkjet printer RIP needs.
For sign making or photo printing, the installation guide ensures quick starts on Windows compatible systems. Community forums provide additional beginner tips, making Wasatch SoftRIP a top choice in this SoftRIP review.
Intuitive Setup and Installation
The setup wizard in Wasatch SoftRIP guides users through initial configuration step by step. It detects connected printers like Canon or HP and applies driver integration automatically. This makes installation far easier than manual setups in Onyx RIP.
Beginners can follow the installation guide to select their printer model and load pre-configured media profiles. For example, setting up an Epson for dye sublimation takes minutes. Troubleshooting common error messages is covered in built-in help.
System requirements are modest, supporting both Windows and Mac with low memory usage. Activation via license key is straightforward after downloading the demo version. Updates ensure reliability without performance hits.
New users benefit from Wasatch Academy training videos that walk through first prints. This beginners guide minimizes frustration compared to AcroRIP’s sparse docs.
User-Friendly Interface and Ease of Use
Wasatch SoftRIP features a clean user interface with drag-and-drop job submission. Icons for nesting, tiling, and color correction are intuitive, ideal for RIP software for beginners. Print queues update in real time for better control.
Hot folders automate file formats like PDF RIP, EPS support, and TIFF processing. Beginners handle variable data printing without confusion, unlike cluttered Onyx RIP screens. Drop a PDF, set ink limits, and print sums up the workflow.
Queue management prioritizes jobs easily, supporting cut contour for vinyl cutting. The interface scales for poster production or fine art prints. Customization options grow with user skill.
Forums highlight high user ratings for ease of use in this Wasatch review. Learning curve is gentle, with tooltips explaining features like linearization.
Beginner-Friendly Features and Support
Key RIP features include ICC profiles for accurate color management on Roland or UV printing setups. Pre-built profiles for direct to garment or screen printing prep save time. Custom profiles are simple to create as skills build.
Customer service and Wasatch forum offer quick help for novices. Tutorials cover print speed optimization and output quality tweaks. This beats AcroRIP’s limited support.
Pricing options like perpetual license or subscription fit budgets, with Wasatch SoftRIP price details on the official website. Version history shows ongoing improvements for reliability.
Pros include strong community and cons like higher initial cost versus free alternatives. Experts recommend it as the best RIP for beginners in wide format printing.
Installation Guide
Installing Wasatch SoftRIP takes 15-20 minutes on Windows 10/11 systems with the automated installer handling driver integration. Beginners find the setup wizard straightforward, guiding users through license activation and initial configuration. This installation guide ensures smooth setup for wide format printing.
Download the installer from the official source after obtaining your license key. Run as administrator to avoid permission issues common in RIP software setups. The process includes selecting your inkjet printer RIP model, like Epson or Roland printers.
Post-install, restart your system for optimal print workflow performance. Test with a simple job to verify color management and queue setup. This tutorial for beginners minimizes errors during initial use.
Expect prompts for media profiles and ICC profiles during setup. Save custom settings for repeated jobs in nesting or tiling. Users praise the ease of use in forum reviews for quick onboarding.
System Requirements
Wasatch SoftRIP runs best on Windows compatible systems with at least 8GB RAM and a modern processor. It supports wide format printing on printers like Canon, Roland, HP, and Epson models. Check your hardware against these specs before starting the SoftRIP download.
Dedicated graphics cards improve performance and speed for large files in PDF RIP or TIFF processing. Ensure 50GB free disk space for hot folders and job queues. Beginner tips include closing other apps to reduce memory usage.
No native Mac support exists, so use Windows via Boot Camp if needed. Verify driver integration compatibility for your printing software. This setup ensures reliable output quality for sign making or banner printing.
Update your OS for security during installation guide steps. Test RIP features like cut contour for vinyl cutting post-setup. Community forums offer troubleshooting for edge cases.
Step-by-Step Setup
Begin with the demo version or full installer for Wasatch SoftRIP. Double-click the file, accept terms, and enter your activation code. The wizard detects connected printers automatically.
Choose queue management options and set up hot folders for automated job submission. Configure color correction, ink limits, and linearization for your media. Save as a custom profile for future print queue use.
- Launch the software and create a new queue for your printer model.
- Load ICC profiles for accurate color management.
- Import sample files like EPS or PDF to test file formats support.
- Adjust nesting and tiling for efficient media use in poster production.
Restart and print a test page to confirm print speed and reliability. This beginners guide covers common pitfalls like mismatched media profiles.
Troubleshooting Common Issues
If the installer fails, check antivirus blocking driver integration. Run in compatibility mode for older Windows versions. Wasatch forum threads detail fixes for these errors.
Error messages about licenses often stem from offline activation tries. Connect to the internet or contact customer service for manual keys. Verify system requirements match to avoid crashes.
For printer detection issues, reinstall drivers separately before SoftRIP. Clear temp files to resolve memory usage spikes during large variable data printing jobs. Tutorials and documentation provide screenshots for guidance.
Update to the latest version history for bug fixes in UV printing or dye sublimation. Test cut contour paths after fixes. Users report high reliability once resolved.
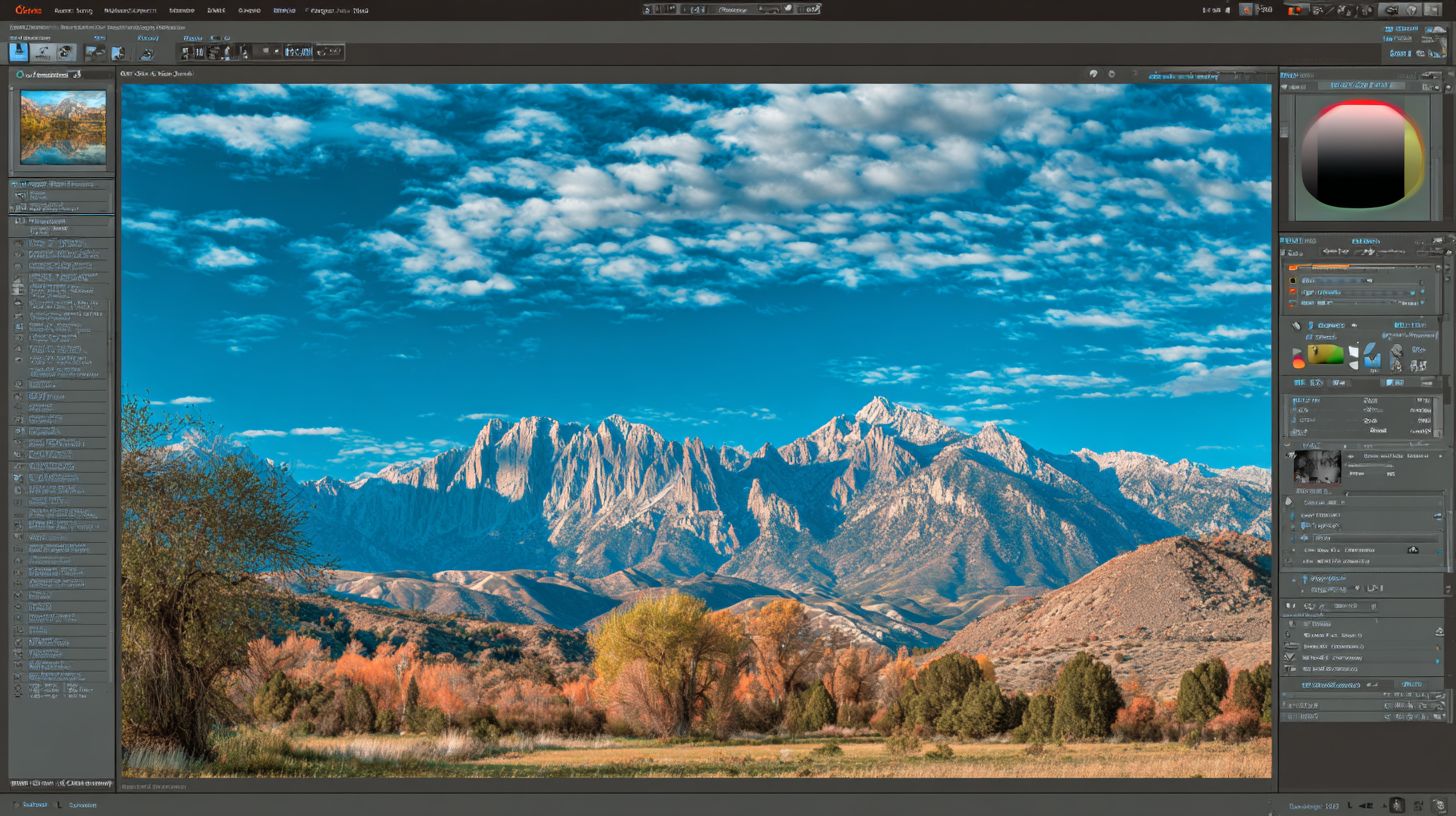
User Interface Overview
SoftRIP’s tabbed interface organizes Queue, Media, Color, and Tools into one screen with customizable workspaces. This clean design keeps essential features accessible without overwhelming beginners. Unlike cluttered competitors like Onyx RIP or Caldera RIP, Wasatch SoftRIP prioritizes simplicity in its user interface.
The non-cluttered layout reduces the learning curve for new users in wide format printing. You can drag and drop jobs into the print queue easily. Custom panels let you focus on queue management or color management without hunting through menus.
For RIP software beginners, this setup shines during job submission from Epson, Canon, or Roland printers. Hot folders automate workflows, keeping the main screen tidy. Experts recommend starting with default tabs to master basics before customizing.
Overall, the interface supports print workflow efficiency across vinyl cutting, dye sublimation, and UV printing. Beginners appreciate the intuitive navigation over feature-packed but busy alternatives. This makes Wasatch SoftRIP a top choice in SoftRIP reviews for ease of use.
Main Navigation Tabs
The Queue tab serves as your central hub for job management in Wasatch SoftRIP. Submit files like PDFs or EPS directly here for processing. Monitor progress with real-time previews to catch issues early.
Switch to the Media tab to select profiles for your inkjet printer RIP needs. Load custom media settings for banner printing or fine art prints. This keeps setups consistent across jobs.
The Color tab handles ICC profiles, linearization, and ink limits simply. Adjust settings for accurate color correction on HP or Roland printers. Beginners can use presets before diving into advanced tweaks.
Finally, the Tools tab offers nesting, tiling, and cut contour features. Organize multiple designs efficiently for sign making. These tabs create a streamlined path in your printing software workflow.
Customizable Workspaces
Wasatch SoftRIP lets you save custom workspaces tailored to tasks like photo printing or direct to garment. Rearrange tabs and panels with a right-click for quick access. This flexibility suits beginners building confidence.
For example, create a workspace focused on variable data printing by pinning the Queue and Color tabs. Switch back to defaults anytime via the menu. It saves time during high-volume poster production.
Integrate driver settings for Canon or Epson printers directly into your layout. Test changes without disrupting your flow. Users in Wasatch reviews praise this for reducing setup errors.
Lock workspaces to prevent accidental changes, ideal for shared environments. Export them for team use in screen printing prep. This feature enhances ease of use over rigid competitors like SAI FlexiRIP.
Beginner-Friendly Features
A setup wizard guides initial configuration, linking to your printer and media profiles. Tooltips explain buttons on hover, perfect for a tutorial for beginners. Access documentation from the help menu anytime.
Drag-and-drop file support handles TIFF processing and PDF RIP effortlessly. Preview jobs at full resolution before ripping. This prevents waste in wide format printing trials.
Hot folders automate job submission, watching directories for new files. Set rules for nesting or color profiles per folder. Beginners gain pro-level efficiency without complex scripting.
The interface includes searchable menus and recent jobs lists. Troubleshoot error messages with built-in tips. These elements make Wasatch SoftRIP reliable for printing industry newcomers.
Core RIP Functions Explained
SoftRIP’s core functions convert vector PDF/EPS files into printer-specific raster data with automatic trapping and overprint handling. This RIP pipeline forms the backbone of Wasatch SoftRIP, making it ideal for beginners in wide format printing. It simplifies complex print workflows for inkjet printers like Epson, Canon, and Roland models.
The process starts with file input, where supported formats such as PDF, EPS, and TIFF enter the queue. SoftRIP then applies color management and rasterizes data for precise output. Beginners appreciate the automatic trapping, which prevents gaps between colors without manual tweaks.
Queue management and hot folders streamline job submission. Users drag files into hot folders for hands-off processing, perfect for busy sign making or banner printing shops. This setup boosts efficiency in the printing industry.
For print workflow reliability, SoftRIP handles nesting and tiling automatically. It optimizes media use, reducing waste on jobs like posters or fine art prints. New users find this intuitive in the Wasatch SoftRIP review for everyday tasks.
Color Workflow in Detail

Wasatch SoftRIP excels in color management, using ICC profiles for accurate color across printers. Beginners start by selecting media profiles for their device, like Epson or HP printers. The software linearizes inks and sets limits to avoid over-saturation.
Color correction tools allow simple adjustments via sliders for density and balance. For example, print a test strip on vinyl for dye sublimation, then tweak profiles. This ensures consistent output quality in UV printing or direct to garment jobs.
Integration with cut contour supports vinyl cutting alongside printing on Roland devices. Overprint handling merges layers seamlessly, vital for multi-color banners. Experts recommend starting with default profiles for a short learning curve.
Custom profiles let users build libraries for specific inks or media. Save settings after calibrating with a densitometer for photo printing. In this SoftRIP review, the color workflow stands out for ease of use in beginner tutorials.
Workflow Setup for New Users
Create your first workflow in Wasatch SoftRIP: 1) Import PDF via drag-drop, 2) Select Epson media profile, 3) Enable nesting (saves media), 4) Submit to queue. This print workflow suits beginners using RIP software for wide format printing. It works well with Epson printers and other inkjet models.
New users find the user interface straightforward for setup. Drag your file into the hot folder or directly to the queue. Choose profiles for Epson Premium Luster to match your media.
Enable key RIP features like nesting and cut contour export early. This prepares jobs for vinyl cutting or banner printing. Queue management keeps everything organized for smooth output.
Your full 7-step process takes about 8 minutes for the first job. Follow these steps: 1) Set up hot folder, 2) Pick media, 3) Adjust RIP settings, 4) Turn on nesting, 5) Export cut contour, 6) Submit to queue, 7) Output to printer. Always linearize before production to avoid common mistakes in color management.
Step-by-Step Hot Folder and Media Setup
Start with hot folder setup, a watch folder that automates file processing in Wasatch SoftRIP. Create one via the queue manager for PDF, EPS, or TIFF files. This simplifies the installation guide for beginners.
Select your media profile, such as Epson Premium Luster for photo printing. Load ICC profiles for accurate color correction on Canon or Roland printers. Custom profiles help with dye sublimation or UV printing tasks.
Set 300 DPI in RIP settings for sharp output quality. Test on small jobs first to check ink limits and linearization. This step ensures reliability in your printing software routine.
Nesting, Export, and Queue Submission
Turn nesting on to optimize media use in SoftRIP review tests. It arranges designs efficiently for poster production or fine art prints. Combine with tiling for large banners.
Enable cut contour export for vinyl cutting integration. This sends paths to plotters after RIP processing. Supports variable data printing for custom sign making.
Submit to the print queue once settings are ready. Monitor jobs in the user-friendly interface. Output directly to your HP or Epson printer for fast results.
Tips to Avoid Beginner Mistakes
Always linearize before production to calibrate ink channels properly. Skipping this leads to color shifts in wide format printing. Use the built-in tool in Wasatch SoftRIP for quick fixes.
Check file formats like PDF RIP support upfront. Verify system requirements for Windows compatible performance and memory usage. This prevents errors in your tutorial for beginners.
Explore tutorials and documentation for queue management details. Practice on a demo version to master the learning curve. Forum reviews highlight ease of use for new RIP users.
Common Beginner Mistakes
Mistake #1: Skipping linearization causes color drift in print runs. This happens because uncalibrated ICC profiles lead to inconsistent ink laydown on printers like Epson or Roland models. Beginners often overlook this step in their print workflow.
Fix it by running a quick 10-minute calibration before jobs. For example, a sign shop lost $2K on 50 miscolored banners due to an un-linearized Epson profile. Use Wasatch SoftRIP’s built-in tools to linearize and ensure color management accuracy.
Other common errors include wrong media profiles, PDF transparency issues, hot folder permissions, and oversized RIP files. Addressing these boosts output quality in wide format printing. This beginners guide covers solutions below.
No Linearization: Color Drift
Without linearization, colors shift across print runs in Wasatch SoftRIP. Ink limits go unchecked, causing posters or banners to vary from proof to final output. This plagues inkjet printer RIP users new to the software.
Run the linearization wizard first, printing test strips and measuring with a spectrophotometer. Save the curve to your custom profiles for Epson printers or Canon models. Repeat for each media type to maintain consistency.
Experts recommend this for color correction in dye sublimation or UV printing. It prevents costly reprints and improves RIP features reliability in your queue management.
Wrong Media Profile: Banding Issues
Selecting the wrong media profile creates banding in gradients on Roland or HP printers. Beginners pick generic settings, ignoring substrate specifics like vinyl or banner material. This disrupts print speed and quality.
Solution: Build or select custom profiles matching your roll width and ink type. Test with a simple gradient job in the tutorial for beginners section of Wasatch documentation. Adjust ink limits to eliminate streaks.
Proper profiles enhance nesteing and tiling for efficient wide format printing. Users in Wasatch forum reviews praise this for reducing waste in sign making.
PDF Transparency: Flatten First
PDF transparency issues cause artifacts in SoftRIP’s PDF RIP processing. Layered files with blends don’t rasterize cleanly, leading to dropouts on outputs for photo printing or fine art prints. Common in designs from Adobe software.
Flatten transparencies in your graphics app before submission, or use Wasatch’s pre-flight tools. Convert to high-res TIFF if needed for EPS support or TIFF processing reliability. This ensures smooth job submission.
Practice in the demo version to master this in your print queue. It supports variable data printing without errors.
Hot Folder Permission Errors
Hot folder permission errors halt automated workflows in Wasatch SoftRIP. Windows or Mac users forget to grant read-write access, blocking file drops for cut contour or vinyl cutting jobs. Frustrating for queue management.
Check folder properties and set full permissions for the RIP user account. Restart the hot folders service via the user interface. Test with a small PDF to confirm print workflow automation.
This fix aids direct to garment or screen printing prep. Forum reviews highlight its ease after initial setup.
Oversized RIP Files: Reduce DPI
Oversized RIP files crash jobs or slow performance due to high DPI settings. Beginners submit 600 DPI images for large banners, spiking memory usage on standard systems.
Reduce DPI to 150-300 for most wide format needs in your prep software. Use SoftRIP’s scaling tools during RIPping to manage file size. This speeds up output quality without loss.
Ideal for poster production or banner printing. Check system requirements for optimal performance in this RIP comparison with Onyx or Caldera.
Pricing and Licensing
SoftRIP offers perpetual licenses starting at $1,495 for 1-printer (Epson/Canon) up to $4,995 for unlimited printers + features. These licenses provide lifetime access without recurring fees. Beginners appreciate the straightforward pricing structure in this Wasatch SoftRIP review.
The software includes a 30-day free trial with full features across all editions. This lets you test compatibility with your Epson printers or Canon printers before buying. It covers essential RIP features like color management and queue management.
Wasatch SoftRIP pays for itself quickly through efficiency gains. For example, it handles 150 print jobs that might otherwise cost $25 per hour for a designer. This ROI makes it ideal for wide format printing startups.
Upgrade paths allow moving from Basic to Pro or Ultimate as your print shop grows. All editions come with included support and access to tutorials. Check the table below for a full pricing comparison.
| Edition | Printers | Price | Features | Trial |
|---|---|---|---|---|
| Basic | 1-printer | $1,495 | Core RIP, color correction, nesting | 30-day full |
| Pro | 4-printers | $2,995 | Queue management, hot folders, tiling | 30-day full |
| Ultimate | Unlimited | $4,995 | Cut contours, variable data, all features | 30-day full |
Frequently Asked Questions
What is Wasatch SoftRIP and why is it good for beginners?
Wasatch SoftRIP is a professional RIP (Raster Image Processor) software designed for wide-format printing, cutting, and engraving. In this Wasatch SoftRIP Review for Beginners, it’s praised for its user-friendly interface, making it accessible for newcomers who want reliable color management and print production without a steep learning curve.
Is Wasatch SoftRIP easy to learn for printing beginners?
Yes, according to this Wasatch SoftRIP Review for Beginners, the software features intuitive workflows, step-by-step tutorials, and preset profiles that simplify setup. Beginners can quickly produce high-quality prints on vinyl, textiles, and more without prior experience.
What are the key features highlighted in Wasatch SoftRIP Review for Beginners?
This Wasatch SoftRIP Review for Beginners highlights features like advanced color management, job queuing, nesting tools, and support for multiple printers. These make it ideal for starters scaling from hobby to professional printing.
How does Wasatch SoftRIP compare to free RIP software for beginners?
In the Wasatch SoftRIP Review for Beginners, it’s noted to outperform free alternatives with superior accuracy, faster processing, and better support. While pricier, its reliability saves time and material costs for new users entering the print industry.
What are common setup tips from Wasatch SoftRIP Review for Beginners?
The Wasatch SoftRIP Review for Beginners recommends starting with the trial version, calibrating your monitor, and using built-in wizards for printer profiles. This ensures vibrant, accurate outputs right from your first job.
Where can beginners get Wasatch SoftRIP and support?
As per this Wasatch SoftRIP Review for Beginners, download the free trial from the official Wasatch website. Excellent customer support, forums, and video guides are available, helping beginners troubleshoot and master the software quickly.