
Embroidery Business
How to Create Custom Embroidery Fonts

Mar
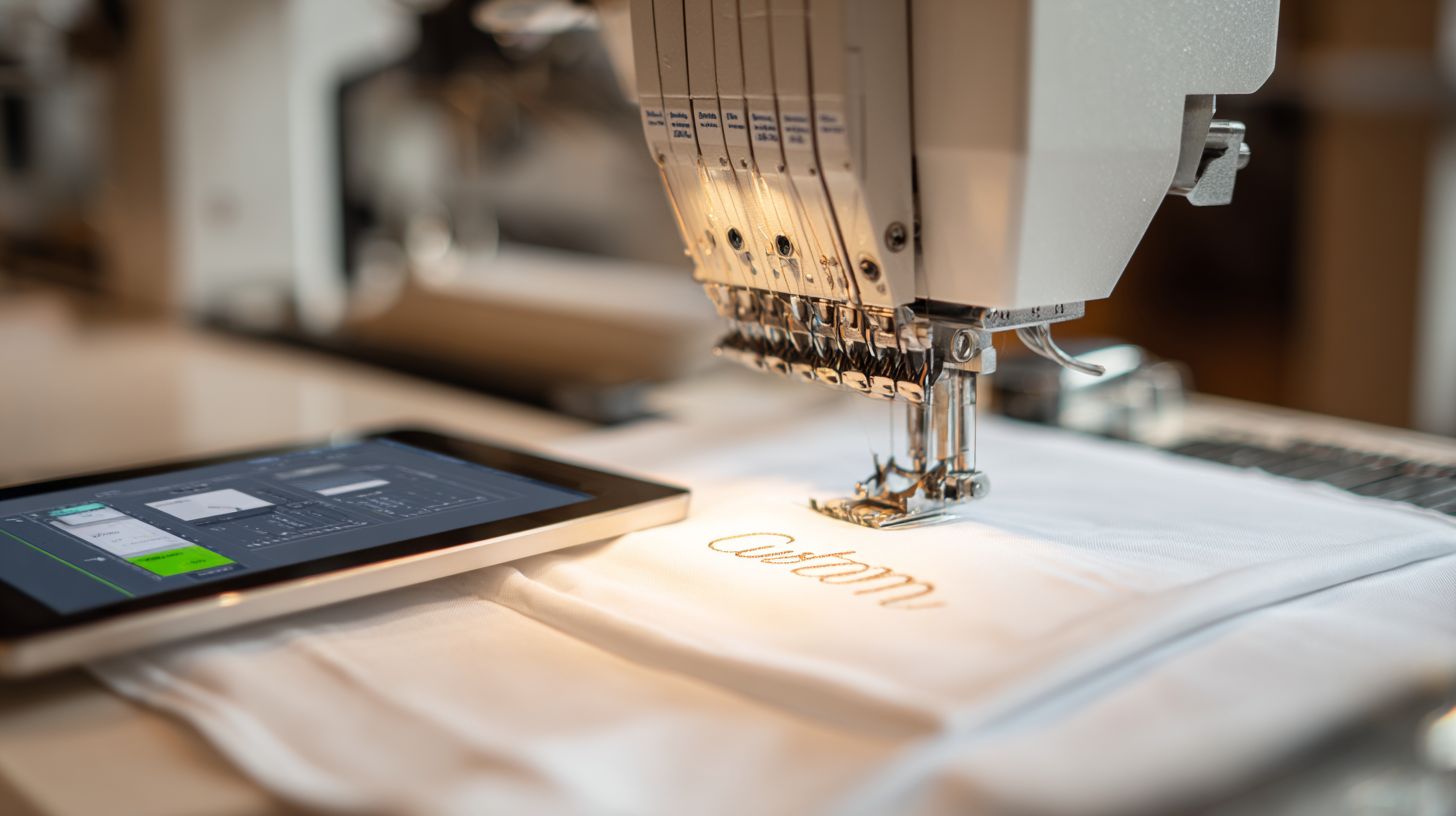
Imagine crafting one-of-a-kind embroidery fonts that elevate your designs from ordinary to unforgettable. Custom fonts unlock endless creative potential, transforming monograms, logos, and apparel with precision stitching tailored to fabric and machine limits.
Discover essential tools like Wilcom and Inkscape, plan character sets with stitch density in mind, digitize simplified vectors, optimize paths, build full alphabets, test rigorously, and package professionally-master these 25 key steps to create flawless results.
Understanding Embroidery Fonts
Embroidery fonts differ fundamentally from digital fonts by converting vector outlines into thousands of individual stitches optimized for fabric tension and machine compatibility. These fonts must account for fabric stretch, which can distort designs, stitch directionality that affects appearance, and hoop size limitations, with 4×4 inches being most common.
Creating custom embroidery fonts requires attention to these factors to ensure clear, durable results on various fabrics. Unlike screen fonts, embroidery lettering adapts to pull compensation and underlay stitching for stability.
This section covers three key differences: comparisons to standard fonts, stitch limitations, and common styles. Understanding these helps in font digitizing with software like Wilcom, Hatch Embroidery, or Embrilliance StitchArtist.
Practical tips include testing stitch outs on scrap fabric and adjusting for embroidery machine compatibility, such as Brother PE-Design formats like.pes or.dst.
Key Differences from Standard Fonts
Unlike TrueType or OTF fonts rendered as pixels, embroidery fonts convert glyphs into 500-5000 stitches per letter using satin column, fill, or running stitches. This process, known as font conversion embroidery, prioritizes fabric behavior over infinite scaling.
Standard fonts excel in screen rendering with no physical limits, while embroidery lettering demands minimum heights and compensation for distortion. For example, Arial works smoothly on screens but needs an Arial Satin version for embroidery.
| Feature | Standard Fonts | Embroidery Fonts |
|---|---|---|
| Rendering | Screen pixels | Stitch-based |
| Scaling | Infinite | 0.25″ minimum height |
| Limits | No fabric constraints | 30% pull compensation required |
| Examples | Arial | Arial Satin |
- Satin columns limited to 0.375 inches wide to avoid gaps.
- Letter height below 0.25 inches becomes unreadable on most fabrics.
- Density over 7 stitches per mm risks puckering and fabric damage.
- Jump stitches exceeding 10mm require trims for clean results.
Stitch Limitations and Considerations
Embroidery fonts face strict limitations: minimum letter height 0.25 inches, maximum satin column width 0.375 inches, and stitch density 4-7 stitches/mm to prevent puckering. These rules guide digitizing software settings for reliable designs.
Designers use pull compensation runs and underlay stitching to counter fabric stretch. Test small text embroidery on stabilizers to check readability before full projects.
- Satin columns wider than 8mm create gaps, so switch to fill stitching.
- Letter height under 6mm proves unreadable, especially on stretchy fabrics.
- Density above 7/mm damages fabric, so adjust in embroidery design software.
- Angles over 30 degrees cause gaps; add compensation runs.
- Jump stitches over 10mm need trims to reduce thread breaks.
| Stitch Type | Max Width | Use Case |
|---|---|---|
| Satin Column | 8mm | Letter outlines |
| Fill | No limit | Bold block letters |
| Running | Minimal | Monoline scripts |
Software like Bernina or Brother PE-Design includes stitch simulators to preview these issues.
Common Embroidery Font Styles
Popular styles include Block Satin (bold, 0.3-1″ height), Script Running (delicate, 0.5-2″ height), Monoline (minimalist, single running stitch), and 3D Puff (raised foam backing). Each suits specific embroidery hoop sizes and fabrics.
Choose styles based on project needs, like cursive embroidery fonts for monogramming or pixel fonts for retro designs. Adjust font kerning and letter spacing in tools like Embird or Ink/Stitch.
| Style | Stitch Type | Best Size Range | Use Cases | Examples |
|---|---|---|---|---|
| Block | Satin/Fill | 0.5-2″ | Names, logos | Bold initials |
| Script | Running | 0.5-1.5″ | Monograms | Cursive script |
| Gothic | Column | 0.4-1.2″ | Decorative text | Medieval lettering |
| Serif | Fill | 0.3-1″ | Elegant labels | Times-like |
| Sans-serif | Satin | 0.25-1.5″ | Modern branding | Helvetica adapt |
| Applique | Running | 1-3″ | Large patches | Fabric cutouts |
| 3D Puff | Fill + Foam | 0.5-1.5″ | Raised effects | Puffy letters |
| Pixel | Short Satin | 0.25-0.75″ | Retro, small text | 8-bit style |
Fabric recommendations: stable cottons for block fonts, stabilizers for knits with scripts. Use polyester threads for durability in multi-color letters.
Tools and Software Required
Creating professional embroidery fonts requires specialized digitizing software like Wilcom and Hatch, plus vector editors such as Inkscape and Illustrator, and font tools. Professional digitizing software converts vector artwork into machine-readable stitch files for custom embroidery fonts. Vector editors help create clean letter outlines with precise bezier curves.
These tools handle font kerning, letter spacing, and baseline adjustments essential for embroidery lettering. Beginners start with affordable options for single letter embroidery or name designs. Pros use advanced features for alphabet creation embroidery like satin stitching and fill patterns.
Key categories include embroidery digitizing software for stitch generation, vector graphics editors for outlines, and font creation tools for TTF to embroidery conversion. Match tools to your needs, like embroidery hoop size and machine formats such as PES or DST. Test with stitch simulators to preview monogramming fonts.
Learning curves vary, with free tools offering quick starts for cursive embroidery fonts. Paid software provides auto-digitizing fonts and manual controls for pull compensation. Combine them for workflows like SVG to embroidery paths.
Embroidery Digitizing Software Options
Wilcom EmbroideryStudio E4 ($4,995) leads for professional font digitizing, while Embrilliance StitchArtist ($169) offers beginners satin column tools with auto-kern. These tools turn vector fonts into stitches for custom font embroidery. They support stitch types like running stitch fonts and 3D puff fonts.
| Tool | Price | Key Font Features | Best For | Pros/Cons |
|---|---|---|---|---|
| Wilcom E4 | $4995 | Advanced font kerning, satin/steil stitch, auto-digitizing letters | Professional alphabet creation | Pros: Precise control; Cons: Steep learning curve |
| Hatch | $1649 | Font libraries, multi-color letters, gradient fills | Commercial embroidery fonts | Pros: User-friendly; Cons: Limited free trial |
| Embrilliance StitchArtist | $169 | Manual digitizing letters, column width adjustment, underlay stitching | Beginner font digitizing | Pros: Affordable; Cons: Basic advanced techniques |
| Brother PE-Design 11 | $1300 | Auto-kern, font scaling, PES export | Brother embroidery machine users | Pros: Machine integration; Cons: Brother-focused |
| Bernina V8 | $1729 | Font registration marks, stitch density control, Bernina hoop compatibility | Bernina users | Pros: Seamless hoop use; Cons: Brand-specific |
| Embird | $163 | Font conversion embroidery, cross-stitch fonts, custom alphabet design | Budget digitizers | Pros: Low cost; Cons: Manual heavy |
Wilcom excels in font editing software for complex script fonts embroidery with compensation runs. Embrilliance suits hobbyists creating initial embroidery via simple satin tools. Choose based on your embroidery machine compatibility.
For name embroidery, test stitch outs on fabric with stabilizers. Both handle trims between letters and reducing jumps. Experts recommend Wilcom for high-volume monogram designs.
Vector Graphics Editors
Adobe Illustrator ($20.99/mo) excels at bezier curve letter design, while free Inkscape with Ink/Stitch extension auto-generates embroidery paths from SVGs. These editors create font outlines for embroidery design software. They ensure clean paths for SVG to embroidery workflows.
| Tool | Price | Vector Font Features | Embroidery Export | Learning Curve |
|---|---|---|---|---|
| Illustrator | $20.99/mo | Path tools, node editing, font distortion | SVG, PDF to digitizer | Medium |
| Inkscape + Ink/Stitch | Free | SVGPES conversion, stitch types preview | PES, DST, EXP | Low |
| CorelDRAW | $22.42/mo | Bezier curves embroidery, circular text | SVG, EMF export | Medium |
| Affinity Designer | $69 one-time | Vector fonts, warping text, mirror lettering | SVG paths | Low |
Ink/Stitch shines in font tracing for TrueType fonts to embroidery, converting to PES for Brother machines. Use it for arched fonts or vertical text. Pair with digitizers for stitch density tweaks.
Illustrator handles serif fonts embroidery with precise node editing. Free options lower barriers for beginner font digitizing. Preview exports in embroidery file formats like HUS or JEF.
Font Creation Tools
FontForge (free) converts TTF/OTF to embroidery outlines, while Birdfont ($49) simplifies variable font creation for scalable letterforms. These tools generate vectors for create embroidery fonts workflows. They focus on font conversion embroidery before digitizing.
- FontForge (free): Exports TTF to SVG paths for Ink/Stitch; ideal for gothic fonts with high path accuracy.
- Birdfont ($49): Builds variable fonts for font scaling; supports cursive script with smooth curves.
- Glyphs Mini ($299): Professional glyph design for sans-serif embroidery; exports to OTF for vector editors.
- Calligraphr: Scans hand-drawn letters to vector for decorative fonts; great for custom monoline fonts.
- Fontself ($49, Illustrator plugin): Turns shapes into fonts inside Illustrator; perfect for pixel fonts embroidery with quick previews.
Start with FontForge for OTF fonts embroidery, importing to digitizers for satin stitching. Birdfont aids resize embroidery fonts without distortion. Test conversions for letter spacing embroidery.
These enable custom alphabet design like block fonts or applique fonts. Combine with thread charts for color selection in multi-color letters. Troubleshoot common font errors via stitch simulators.
Planning Your Custom Font
Strategic planning prevents costly redesigns by defining style, character coverage, and technical specs before digitizing. Poor planning often leads to issues in embroidery font creation. Start by outlining your project’s goals to ensure smooth custom embroidery fonts.
Define the purpose first, such as monogramming or logos. Select essential characters like uppercase letters and numbers. Calculate stitch parameters based on target hoop sizes and fabrics to match your embroidery machine.
Consider tools like Wilcom software, Hatch embroidery, or Embrilliance StitchArtist for digitizing. Test fabric types early, such as cotton or denim. This approach supports font digitizing from vector fonts or TrueType fonts to embroidery formats like.pes or.dst.
Plan for stitch density, pull compensation, and underlay stitching. Adjust for hoop tension and stabilizer requirements. These steps make create embroidery fonts efficient for Brother, Janome, or Bernina machines.
Defining Font Style and Purpose
Classify your font: Decorative Script for wedding monograms, Industrial Block for logo text, Minimal Monoline for small text determines stitch types and density. Match style to purpose in custom font embroidery. This guides choices in embroidery design software.
Use this decision matrix to select styles for common purposes.
| Purpose | Recommended Style | Target Size | Stitch Types | Stitch Density |
|---|---|---|---|---|
| Monogramming | Script | 1-2 inches | Satin, Running | 4-5/mm |
| Logos | Block | 2-4 inches | Fill, Satin | 6-7/mm |
| Home Dec | Decorative | 3-5 inches | Fill, Motif | 5-6/mm |
| Names | Cursive | 0.75-1.5 inches | Monoline, Satin | 4-5/mm |
| Branding | Sans-serif | 2-3 inches | Fill, Column | 6-7/mm |
| Initials | Gothic | 1.5-3 inches | Satin, 3D Puff | 5-6/mm |
Script fonts work well for embroidery lettering on apparel. Block styles suit monogramming fonts on hats. Adjust for font kerning and letter spacing in software like Bernina software.
Test styles with stitch simulator for thread charts and polyester threads. Consider satin column tool for edges. This ensures compatibility across embroidery file formats.
Character Set Selection
Start with 26 uppercase + 10 numbers for monogramming. Expand to 94 characters for full alphabets in alphabet creation embroidery. Prioritize phases to build custom embroidery fonts efficiently.
- Phase 1: 36 characters (A-Z, 0-9) for basic name embroidery.
- Phase 2: 26 lowercase for versatile embroidery lettering.
- Phase 3: 32 symbols like &, @ for complete sets.
Focus on single letter embroidery first, then connect with auto kerning. Use font preview in Brother PE-Design. This supports manual digitizing letters or auto-digitizing fonts.
Estimate stitches by type: block letters need more than running stitch fonts. Include font registration marks for alignment. Test on fabric for trims between letters and jumps.
Measuring Stitch Density and Size
Calculate density by fabric: Cotton at 5 stitches/mm, Denim at 6.5/mm, Stretch at 4/mm. Minimum letter height equals hoop size divided by 8, so a 4×4 inch hoop allows 0.5 inch minimum. These specs guide stitch density in font scaling.
| Fabric Type | Recommended Density (stitches/mm) | Pull Factor | Underlay Suggestion |
|---|---|---|---|
| Cotton | 5 | 1.3 | Light zigzag |
| Denim | 6.5 | 1.4 | Full lattice |
| Stretch | 4 | 1.2 | Heavy running |
| Knit | 4.5 | 1.25 | Grid pattern |
Use estimator: Block letters = height x width x density x 1.3 pull factor. For a 5×7 hoop, fit 72 characters per line. Adjust resize embroidery fonts with compensation runs.
Hoop sizes matter: 4×4 hoop fits 48 characters/line for small text embroidery. Match to embroidery hoop size and machine like Pfaff or Husqvarna. Optimize with pull compensation and stabilizer.
Creating Base Letter Designs
Clean vector outlines in Inkscape or Illustrator form the foundation for all stitch generation in custom embroidery fonts. Vector paths must eliminate interior holes smaller than 2mm to avoid stitching errors. Limit nodes to fewer than 50 per letter and maintain stroke weights between 0.5-3mm for smooth embroidery font creation.
Simplification prevents common issues like thread breaks or gaps in digitizing software such as Hatch embroidery or Embrilliance StitchArtist. Start with bold, simple shapes for letters to ensure compatibility with embroidery machines like Brother or Bernina. This approach supports various stitch types, including satin and fill stitching.
Test your base designs by exporting to SVG to embroidery formats like.pes or.dst. Use stitch simulators to preview results before full production. Consistent preparation leads to reliable custom font embroidery for monogramming or name embroidery.
Focus on font outlines without fine details for better stitch density control. Adjust for pull compensation early to maintain shape integrity. These steps make alphabet creation embroidery efficient across hoop sizes.
Drawing Letters in Vector Format
Use Inkscape’s Bezier tool with 3-5 nodes per curve. Maintain consistent stroke weight at 1.5pt, which equals 0.21mm for embroidery. This keeps paths suitable for font digitizing in tools like Wilcom software.
- Set document DPI to 300 for high-resolution vector fonts.
- Draw baseline guides in 0.1-inch increments to align letters.
- Use Pen tool for outlines only, avoiding fills initially.
- Apply Boolean union to overlapping paths for solid shapes.
- Save as SVG 1.1 for compatibility with embroidery design software.
For example, a complex ‘O’ with 45 nodes simplifies to 18 nodes after editing. This reduction aids manual digitizing letters and prevents jumps in single letter embroidery. Practice on block fonts before tackling cursive embroidery fonts.
Align all glyphs using a baseline embroidery grid. Export tests to Bernina software or Brother PE-Design for preview. These steps ensure scalable custom embroidery fonts for various projects.
Simplifying Shapes for Stitching
Reduce interior details smaller than 1.5mm by using Path > Simplify. Set maximum satin width to 7mm to prevent gaps in column stitch. These changes optimize paths for stitch types like steil or running stitch fonts.
- Eliminate holes smaller than 2mm, such as tiny counters in serif fonts embroidery.
- Merge paths closer than 1mm apart to cut node count.
- Round corners with radius greater than 0.5mm for smooth satin columns.
- Eliminate taper ends shorter than 1mm on script fonts embroidery.
- Remove serifs under 0.8mm for cleaner sans-serif embroidery.
- Flatten curves exceeding 5 nodes to basic bezier curves embroidery.
- Union adjacent elements to minimize trims between letters.
Before/after SVG comparisons often show major improvements in stitch reduction. A detailed letter might drop from dense paths to streamlined outlines. This supports auto-digitizing fonts and reduces embroidery time.
Apply underlay stitching after simplification for stability. Test in font preview modes of Ink/Stitch or Embird software. Simplified shapes excel in small text embroidery and large scale lettering.
Maintaining Consistent Proportions
Set x-height to 70% of cap-height, ascender to 150% of x-height, and descender to -25% of x-height across all glyphs. This creates balanced embroidery lettering for monoline fonts or pixel fonts embroidery. Uniform proportions aid font scaling and resize embroidery fonts.
| Metric | Target Ratio | Tolerance | Examples |
|---|---|---|---|
| Cap-height | 100% | +-5% | A=100%, H=100% |
| x-height | 70% | +-3% | a=70%, e=70% |
| Ascender | 150% | +-4% | b=150%, d=150% |
| Descender | -25% | +-2% | g=-25%, y=-25% |
Use a baseline alignment grid in Inkscape for precise setup. Adjust font kerning with pairs like AV at -0.8mm and TY at -0.5mm. This prevents overlaps in letter spacing embroidery for cursive script or gothic fonts.
Preview kerning in stitch simulators to check automatic kerning needs. Apply manual spacing adjustments for decorative fonts. Consistent proportions ensure professional results in multi-color letters or 3D puff fonts.
Digitizing Letters for Embroidery
Convert vector outlines to machine stitches using column, fill, or running stitch objects in Hatch or Wilcom. Digitizing applies fabric physics like pull and directional tension. Proper stitch angles and underlays prevent distortion in custom embroidery fonts.
Start with vector fonts such as SVG or TrueType outlines for embroidery font creation. Software like Embrilliance StitchArtist or Wilcom traces paths into stitch objects. This process ensures letters hold shape on stretchy fabrics during embroidery lettering.
Focus on font digitizing techniques for monoline fonts or block fonts. Adjust stitch density to match fabric type and hoop size. Test single letter embroidery to refine before full alphabet creation.
Use pull compensation by adding slight offsets to satin columns. Manual digitizing letters offers control over cursive embroidery fonts or serif fonts embroidery. Always preview in stitch simulator for accurate font scaling.
Importing Designs into Software
Import SVG at 100% scale; Embrilliance auto-digitizes at 85% accuracy vs Wilcom manual 98% precision. Scale to 1:1 hoop units first for precise font conversion embroidery. This sets up clean vector fonts in embroidery design software.
- Scale SVG to 1:1 hoop units matching your embroidery hoop size.
- Apply 0.2mm outline offset for pull compensation.
- Set stitch units to mm for consistency across machines.
- Check node count under 40 per letter to avoid jagged edges.
- Save a working copy before editing.
Table below shows key import settings for popular digitizing software.
| Software | Scale Setting | Offset | Units | Node Limit |
|---|---|---|---|---|
| Hatch Embroidery | 100% | 0.2mm | mm | <40/letter |
| Wilcom | 1:1 | 0.2mm | mm | <40 |
| Embrilliance | 100% | 0.2mm | mm | <40 |
| Bernina | 1:1 | 0.2mm | mm | <40 |
| Brother PE-Design | 100% | 0.2mm | mm | <40 |
After import, edit bezier curves with node tools for smooth OTF fonts embroidery. This workflow supports script fonts embroidery and decorative fonts.
Setting Stitch Types and Angles
Satin Column for straight sections under 7mm, Fill for wide areas over 7mm, Running for monoline under 2mm stroke. Match stitch types to letter shapes in custom font embroidery. This prevents puckering in name embroidery or monogram designs.
Table outlines best choices for common shapes.
| Shape | Best Stitch Type | Max Width | Angle Range |
|---|---|---|---|
| Straight edges | Satin Column | <7mm | 10-45 degrees |
| Wide blocks | Fill | >7mm | Omnidirectional |
| Thin lines | Running | <2mm | Any |
| Curves | Tatami Fill | Variable | 15-60 degrees |
| Outlines | Steil (Satin) | <5mm | 20-40 degrees |
In Hatch, use Column Tool, set density to 5.5/mm, angle at 25 degrees for satin stitching. For fill stitching, choose patterns like lattice for texture effects. Adjust for cursive script or gothic fonts.
- Select Column Tool from toolbar.
- Draw path along letter baseline.
- Set density and angle per table.
- Preview jumps and trims between letters.
Optimize font kerning and letter spacing embroidery during setup. This works for small text embroidery or large scale lettering on Brother embroidery machines.
Applying Underlay Stitching
Apply zigzag underlay at 70% density, 45 degrees angle to stabilize fabric before satin column stitching. Underlay acts as a base for embroidery lettering on various fabrics. It counters distortion in custom embroidery fonts.
Table specifies settings by fabric type.
| Fabric Type | Underlay Density | Angle | Width % |
|---|---|---|---|
| Cotton | 70% | 45 degrees | 90% |
| Stretch | 85% | 45 degrees | 95% |
| Denim | 60% | 30 degrees | 85% |
| Silk | 75% | 45 degrees | 90% |
| Fleece | 80% | 60 degrees | 92% |
- Draw underlay boundary 0.1mm inset from main outline.
- Set zigzag with 2.5mm spacing.
- Apply before column objects in stitch order.
- Match angle opposite to top stitching.
For 3D puff fonts or foam puff, increase density slightly. Use with stabilizer requirements and proper hoop tension. Test sew samples to check font registration marks and baseline embroidery alignment.
Optimizing Stitch Paths

Path optimization reduces jump stitches and total stitches while maintaining visual quality in custom embroidery fonts. Manual path editing eliminates unnecessary trims and jumps that add costs in production. Balanced stitch density prevents puckering or gaps during embroidery font creation.
Use digitizing software like Wilcom, Hatch Embroidery, or Embrilliance StitchArtist to review and adjust paths. Focus on keeping the needle close between letters in embroidery lettering. This approach saves time on multi-letter designs such as names or monograms.
Experts recommend checking stitch previews before sewing. Optimize for embroidery hoop size and fabric types to ensure smooth runs. Test on stabilizers to confirm results in real stitch outs.
Common tools include satin column and fill stitching for font outlines. Adjust letter spacing embroidery and baseline to minimize jumps. These steps enhance efficiency in creating professional monogramming fonts.
Reducing Jump Stitches
Re-order stitch objects to keep needle within 8mm. Use manual tie-in and tie-out instead of auto jumps in embroidery design software. This cuts unnecessary movements in custom font embroidery.
- Analyze the jump report in your software. Flag jumps over 10mm as red for priority edits.
- Reverse object order from A to Z. This groups connected letters like in cursive script or block fonts.
- Add manual tie stitches at ends. Place them short to avoid visible marks.
- Enable auto-trim only for jumps over 5mm. Disable for short transitions.
Before optimization, paths might show 18 jumps. After, reduce to 4 jumps for smoother alphabet creation embroidery. Preview in stitch simulator to verify.
Test on Brother PE-Design or Bernina software for machine compatibility. Adjust font kerning to further minimize issues. This works well for single letter embroidery scaling up to full names.
Balancing Stitch Density
Vary density by area: Serif ends at higher levels for definition, stems for smoothness, counters lower for fabric breath in satin stitching. Use stitch density mapping in software to guide adjustments. This prevents gaps or bunching in serif fonts embroidery.
- Measure satin width of each letter part. Narrow areas need tighter settings.
- Set density inversely: wider areas get lower values. Aim for balance across the font.
- Test a 10cm sample on target fabric. Sew with polyester threads for accuracy.
- Adjust in +-0.5/mm increments. Re-digitize if needed for running stitch fonts.
Fabric-specific curves help: denser for knits, looser for cottons. Include underlay stitching for stability. This technique shines in script fonts embroidery with varying thicknesses.
Software like Embird or Ink/Stitch offers density previews. Combine with fill patterns for decorative fonts. Always sample to match embroidery machine compatibility.
Testing Pull Compensation
Apply compensation to increase satin width based on fabric pull in pull compensation. Use values suited to cotton or stretch materials during font digitizing. This ensures letters hold shape after sewing.
| Fabric | % Compensation | Satin Width Increase |
|---|---|---|
| Cotton | 28% | 0.20mm |
| Stretch | 35% | 0.25mm |
| Denim | 25% | 0.15mm |
| Silk | 30% | 0.22mm |
- Sew three sizes: 0.5 inch, 1 inch, 2 inch letters. Use hoop tension properly.
- Measure any gaps post-stitch out. Note distortions in small text embroidery.
- Adjust object properties in software. Apply to satin column tool settings.
- Re-test on fresh stabilizer. Confirm with monogram designs.
Before compensation, edges gap; after, they align crisply. Ideal for resize embroidery fonts across scales. Pair with needle selection for best results.
Building the Complete Font Set
Systematic character creation ensures uniform spacing and registration across 94 glyphs. Start with a consistent baseline using 0.1mm tolerance, align x-heights precisely, and define kerning pairs for professional results in custom embroidery fonts. This approach in digitizing software like Wilcom or Embrilliance StitchArtist builds reliable embroidery lettering.
Work systematically from uppercase letters to lowercase, then numbers and symbols. Maintain stem thickness across all characters for seamless font scaling and resizing in embroidery hoop sizes. Test with pangrams early to catch spacing issues in embroidery design software.
Use font registration marks and underlay stitching for alignment. Adjust letter spacing embroidery and pull compensation to suit fabric types and stabilizers. This method supports monogramming fonts, script fonts embroidery, and block fonts effectively.
Preview in stitch simulators before full production. Optimize for stitch density and reduce jumps between letters. Complete sets work across machines like Brother, Janome, and Bernina for versatile custom font embroidery.
Creating Uppercase, Lowercase, and Numbers
Digitize A-Z at cap height 100%, a-z at x-height 70%, and 0-9 at cap height 95% while maintaining consistent stem thickness. Use manual digitizing letters in tools like Hatch embroidery or Bernina software for precise control. This workflow ensures embroidery font creation matches vector fonts or TrueType fonts to embroidery conversions.
Follow this production schedule: allocate two days for the uppercase block, three days for lowercase scaled proportionately, and one day for numbers with open counters. Start with satin column tool for stems and fill stitching for counters in font digitizing. Adjust for font thickness and column width early.
| Character Set | Relative Sizing | Stitch Recommendation |
|---|---|---|
| Uppercase A-Z | 100% cap height | Satin + fill |
| Lowercase a-z | 70% x-height | Running + satin |
| Numbers 0-9 | 95% cap height | Fill with open counters |
- Complete all uppercase with uniform kerning.
- Scale lowercase to match ascenders and descenders.
- Test numbers for readability in small text embroidery.
- Run checklist: baseline check, stitch simulator preview, sample sew on stabilizer.
Adding Punctuation and Symbols
Create 32 essential symbols at 60% cap height; use fill stitching for solid punctuation like .,!,?. Scale relative to x-height for consistent baseline embroidery in custom embroidery fonts. Employ satin stitching for tails on, and ; at 2.5mm width.
Essential set includes: .,!?;: ( ) [ ] { } @ # $ % & * + – = / | ” ‘ ` ~ ^ _. Use fill+outline for complex ones like @ and $ in Embird or SewArt. Space punctuation at half the width of numbers for natural flow in name embroidery.
Maintain font kerning pairs with letters, such as A. or co@. Test in circular text embroidery or arched fonts. Optimize trims between letters and compensation runs for smooth monogram designs.
- Period: fill 1.5mm, tight spacing.
- Comma: satin 2.5mm, descender alignment.
- Exclamation: fill column, cap height match.
- At symbol: fill+outline, 60% scale.
Ensuring Uniform Baseline Alignment
Align all glyphs to 0.000+-0.002″ baseline using software registration grid; test with pangram like THE QUICK BROWN FOX JUMPS OVER LAZY DOG. Load into baseline layer in embroidery design software such as Brother PE-Design. Measure deviations with grid tools for precise font registration marks.
Follow this testing protocol: first, load all glyphs to baseline layer. Second, measure deviations pixel by pixel. Third, adjust anchor points and node editing with bezier curves. Fourth, test sew the pangram on hoop with proper tension.
| Tolerance Spec | Allowed Deviation | Fix Method |
|---|---|---|
| Baseline | +-0.002″ | Anchor adjustment |
| X-height | +-0.001″ | Scale nodes |
| Kerning pairs | 0.1mm | Manual spacing |
Check on various fabric types with stabilizer requirements. Use stitch simulator for font preview and anti-aliasing stitches. This ensures reliable resize embroidery fonts and compatibility with.pes,.dst formats for all machines.
Testing and Refining
Iterative testing on target fabrics reveals most required adjustments before production. Test your custom embroidery fonts across three sizes, three fabrics, and two hoop sizes to catch issues early. Document all fixes systematically in a log for consistent embroidery font creation.
Use digitizing software like Wilcom or Hatch Embroidery to preview stitches. Sew out samples on cotton, polyester, and stretch fabrics. Note stitch density, gaps, and puckering for each letter in your alphabet.
Adjust font kerning and pull compensation based on test results. Run tests at different embroidery speeds to simulate real use. This process ensures your embroidery lettering works across machines like Brother or Bernina.
Refine underlay stitching and satin column width iteratively. Save versions of your embroidery design software files in formats like.pes or.dst. Final tests confirm scalability for monogramming fonts from small text to large designs.
Sample Text Embroidery Tests
Sew test sentences like The quick brown fox at 0.75-inch, 1.25-inch, and 2-inch heights on cotton, poly, and stretch fabrics. Create a testing matrix table for three sizes by three fabrics by two speeds, totaling 18 tests. Track density, gaps, and puckering by character in a test log template.
Photograph each stitch out under good lighting from multiple angles. Include details like hoop size, needle type, and thread in your notes. This helps spot issues in font scaling and letter spacing embroidery.
Use stitch simulator in Embrilliance StitchArtist or Bernina software first. Then produce physical samples on your embroidery machine. Log fixes for satin stitching or fill stitching to build reliable custom font embroidery.
Test baseline embroidery alignment and resize embroidery fonts effects. Vary embroidery hoop size to check distortion. These steps refine your full alphabet creation embroidery for various projects.
Common Issues and Fixes
Gap between letters needs increased kerning 0.1-0.3mm; puckering requires reduced density 0.5/mm. Many problems in embroidery font creation stem from poor settings in digitizing software. Use this table for quick reference during troubleshooting fonts.
| Issue | Cause | Fix | Prevention |
|---|---|---|---|
| Gaps between letters | Insufficient pull compensation | Increase kerning 0.1-0.3mm | Add compensation runs |
| Looping threads | Excess stitch density | Reduce density to 0.4/mm | Test on stretch fabrics first |
| Skewed letters | Poor underlay stitching | Adjust underlay angle | Use zigzag underlay |
| Fraying edges | No stabilizer | Add tear-away stabilizer | Match stabilizer to fabric |
| Puckering fabric | High tension | Loosen hoop tension | Pre-test tension settings |
| Uneven satin columns | Wrong column width | Set width 1-3mm | Preview in software |
| Stitch bunching | Improper scaling | Rescale with lock aspect | Avoid extreme resizing |
| Jumps between letters | No trims | Add auto trims | Enable jump reduction |
| Distorted script fonts | Manual node editing | Use bezier curves embroidery | |
| Poor small text | Low font resolution | Increase stitches per mm | Minimum 0.5-inch height |
| Color bleeding | Thin outlines | Thicken column edges | Select polyester threads |
| Hoop marks | Loose hooping | Tighten evenly | Use hoop grips |
Apply fixes in font editing software like Ink/Stitch or Embird. Test after each change on fabric types. This refines cursive embroidery fonts and block styles alike.
Packaging and Sharing
Professional packaging includes multi-format files, usage guides, and licensing terms. Export your custom embroidery fonts in 6-8 formats to ensure compatibility across major embroidery machines. This approach makes your designs accessible to users with Brother, Janome, or Bernina machines.
Include clear documentation to raise the perceived value of your font packs. Provide PDF manuals with sizing charts, stitch density tips, and stabilizer recommendations. Add end-user license agreements that distinguish personal from commercial use.
Package everything in a ZIP file with a professional folder structure. Use consistent naming like ScriptFont_Complete.zip for easy identification. Test the package by simulating a user download and install process.
Share via platforms suited for embroidery design software users, such as Etsy or dedicated font libraries. Offer previews with stitch simulators to showcase font kerning and letter spacing. This builds trust and encourages purchases of your commercial embroidery fonts.
Font File Formats
Export individual letter files (.PES Brother,.DST universal,.JEF Janome) plus complete font libraries. This ensures embroidery machine compatibility for digitizing software like Wilcom or Hatch embroidery. Provide both single letters for monogramming fonts and full alphabets for name embroidery.
Use a conversion workflow in Wilcom software to output 8 formats simultaneously. Start with your vector fonts, apply font conversion embroidery settings for satin stitching or fill stitching, then batch export. Name files with a convention like FONTNAME_A.PES for clarity.
| Format | Machines | Characters/File | Pros/Cons |
|---|---|---|---|
| .PES | Brother | Single or full | Native support, compact; limited to Brother. |
| .DST | Universal (most) | Full alphabet | Wide compatibility, simple; no color info. |
| .JEF | Janome | Single letters | Precise scaling; Janome only. |
| .EXP | Babylock, Brother | Full sets | Color changes easy; machine-specific. |
| .HUS | Husqvarna, Viking | Individuals | Reliable trims; older machines. |
| .VP3 | Pfaff | Complete fonts | Auto kerning; Pfaff exclusive. |
Verify files with stitch simulators in Embrilliance StitchArtist or Brother PE-Design. Adjust for stitch density and pull compensation before finalizing. This matrix guides users to the right format for their embroidery hoop size.
Documentation and Instructions
Include PDF manual: sizing chart, density settings, stabilizer recommendations, licensing terms. Cover font scaling from 0.5 to 3 inches and tips for resize embroidery fonts. Explain how to load designs into Bernina software or Embird.
Create a documentation checklist for comprehensive support. This raises professionalism in your embroidery font creation packages.
- Spec sheet with sizes, stitch density, and pull compensation.
- Loading instructions per brand like Brother or Janome.
- Sizing chart for small text embroidery and large scale lettering.
- EULA for personal use fonts vs commercial embroidery fonts.
- Test sew sample file for stitch outs.
- Contact support details.
- Thread charts for polyester or rayon threads.
- Stabilizer types for fabric varieties.
- Hoop tension and embroidery speed guidelines.
- Font kerning and letter spacing adjustments.
- Troubleshooting common font errors like jumps or trims.
- Preview images of cursive script or block fonts.
Sample spec sheet template: List heights like 1 1.5 2″, note satin column width, underlay stitching, and registration marks. Include visuals of satin stitching vs fill patterns. This helps users achieve perfect name embroidery or monogram designs.
Frequently Asked Questions
How to Create Custom Embroidery Fonts from Scratch?
To create custom embroidery fonts from scratch, start by designing letters in vector software like Adobe Illustrator or Inkscape. Ensure each letter is simplified with clean lines suitable for stitching. Digitize the designs using embroidery software such as Wilcom or Embrilliance, assigning stitch types like satin or fill to mimic font styles. Test on fabric to adjust density and underlay for optimal embroidery results.
What Software is Best for How to Create Custom Embroidery Fonts?
The best software for how to create custom embroidery fonts includes Embrilliance StitchArtist for beginners, Wilcom EmbroideryStudio for professionals, and free options like Ink/Stitch extension in Inkscape. These tools allow font digitizing, stitch editing, and machine format export like.PES or.DST, ensuring compatibility with most embroidery machines.
How to Create Custom Embroidery Fonts Using TrueType Fonts?
To create custom embroidery fonts from TrueType (TTF) files, import the font into embroidery software like Hatch or Bernina ArtLink. Auto-digitize the outlines, then manually refine stitches for better embroidery quality. Adjust pull compensation and resize letters proportionally to prevent distortion during how to create custom embroidery fonts process.
What are Common Mistakes When Learning How to Create Custom Embroidery Fonts?
Common mistakes in how to create custom embroidery fonts include overcomplicating designs with too many details, ignoring fabric stretch which causes puckering, and neglecting stitch angles for smooth curves. Always preview in 3D, test sewouts, and use proper underlay stitches to avoid these issues in your custom embroidery fonts.
How to Create Custom Embroidery Fonts for Specific Machines?
When learning how to create custom embroidery fonts for specific machines like Brother or Janome, use compatible software that exports to the machine’s format (e.g.,.PES for Brother). Customize pull compensation based on the machine’s tension and hoop size. Machine-specific libraries in software like Embrilliance ensure your custom embroidery fonts stitch perfectly.
How to Monetize Skills in How to Create Custom Embroidery Fonts?
After mastering how to create custom embroidery fonts, monetize by selling digitized font sets on Etsy or Creative Fabrica, offering custom digitizing services on Fiverr, or creating tutorials on YouTube. Build a portfolio showcasing diverse styles like script or block fonts to attract clients seeking unique custom embroidery fonts.
(adsbygoogle = window.adsbygoogle || []).push({});