
Embroidery Business
How to Convert Images to Embroidery Designs

Mar
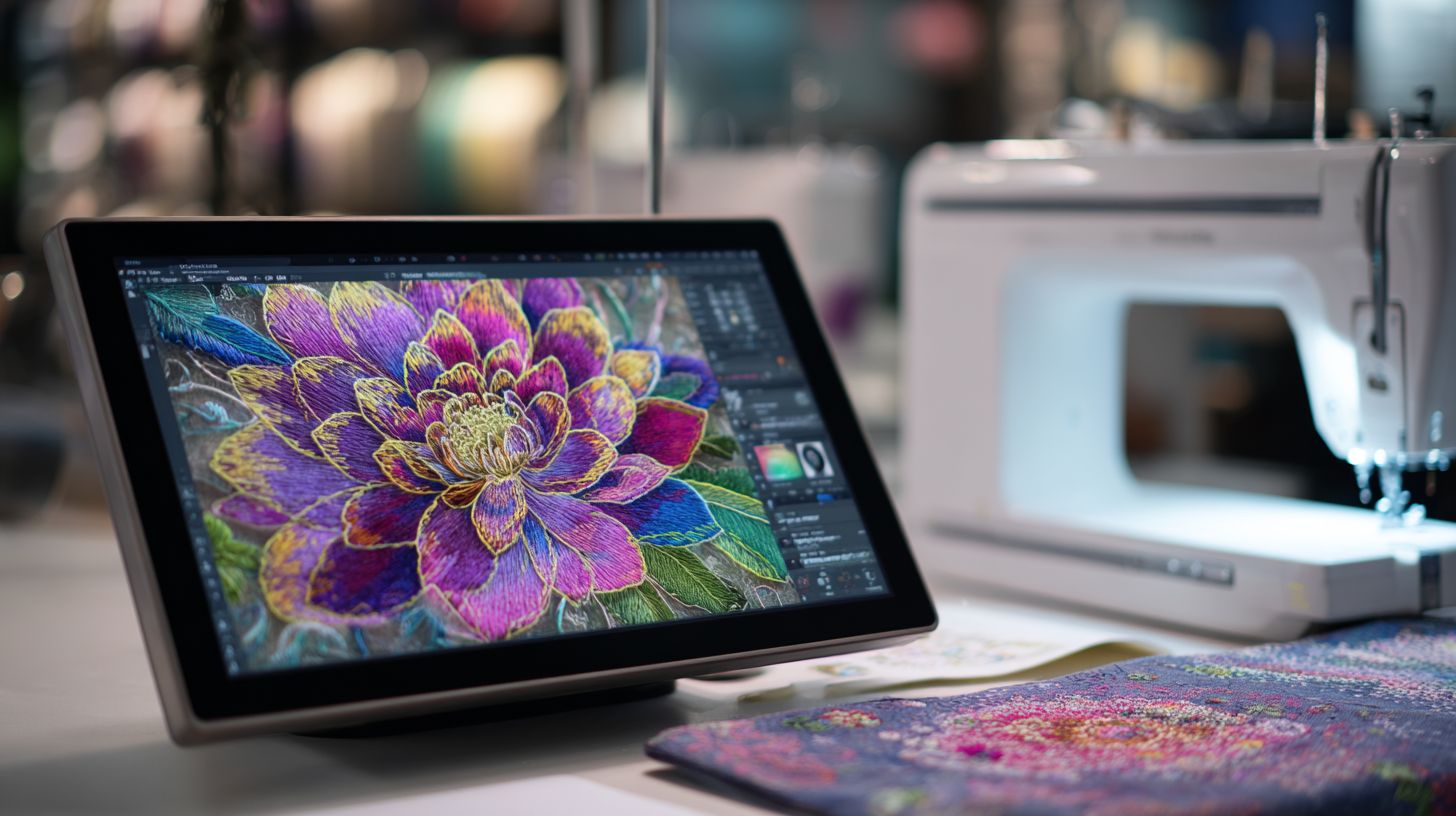
Imagine transforming a cherished photo into a stunning embroidered heirloom that lasts generations. Embroidery digitizing bridges creativity and craft, converting everyday images into machine-ready designs.
This guide covers embroidery basics, ideal image selection, top software like Wilcom and Embrilliance, step-by-step digitizing, optimization techniques, testing, and advanced tips to master the process.
Unlock professional results-start digitizing today!
What Are Embroidery Designs?
Embroidery designs are digital files containing stitch instructions in formats like .PES (Brother),.DST (multi-brand), and .EXP (Baby Lock) that guide machines to create patterns. These files tell the embroidery machine exactly where to place each stitch, color, and movement. They form the basis for converting images to embroidery through digitizing software.
Core components include stitch paths, which outline the route needles follow for shapes like running or satin stitches. Color blocks define areas filled with specific thread colors, often using fill stitches for density. Designs typically range from 500 to 20,000 stitches, depending on size and complexity.
Tie-ins and trimming manage thread connections between stitch runs, reducing loose ends on the back. Underlays provide stabilizing stitches beneath fills to prevent fabric puckering, especially on stretchy materials. Stop commands pause the machine for thread changes or hoop adjustments.
Picture the anatomy like a layered diagram: stitch paths as lines, color blocks as shaded regions, underlays as faint bases, tie-ins as small jumps, and stops as markers. Software like Wilcom or Ink/Stitch visualizes this in a stitch simulator. Understanding these parts helps when you digitize images for embroidery, ensuring clean results on fabrics.
Why Convert Images to Embroidery?
Image conversion enables personalized embroidery like pet portraits. Users of machines such as the Brother PE800 often see higher engagement on platforms like Etsy. This process turns everyday photos into stitchable designs for unique projects.
Converting images offers clear benefits for hobbyists and professionals alike. Personalization stands out as a top reason, with many preferring custom orders in crafting. It allows creators to digitize images for embroidery using tools like Embrilliance StitchArtist or Ink/Stitch free software.
- Personalization: Craft enthusiasts favor custom designs, making items like monogrammed towels or family portraits highly sought after.
- Branding: Uniform logos on apparel build strong recognition for businesses through consistent embroidery file formats like PES or DST.
- Gifting: Photo keepsakes, such as wedding portraits converted to photo to embroidery patterns, add emotional value to presents.
- Commercial production: Teams save time on designs, speeding up workflows with embroidery digitizing software like Wilcom or Hatch Embroidery.
These advantages make image to embroidery conversion essential. Beginners can start with auto digitizing tools for simple raster to vector steps. Experts recommend practicing with high contrast images to optimize stitch density and fabric adaptation.
Whether for home use or commercial embroidery production, this skill opens creative doors. Test designs with a stitch simulator before sewing to ensure quality. Common examples include logo embroidery digitizing or pet photo embroidery for custom patches.
Understanding Embroidery Basics
Mastering embroidery fundamentals ensures designs stitch cleanly on machines from Brother PE550D to 15-needle commercial Melcos. Before converting images to embroidery designs, grasp stitch types and machine limits. This knowledge guides digitizing images for embroidery in software like Wilcom or Embrilliance StitchArtist.
Home machines handle single-needle embroidery with basic hoops, while multi-needle setups speed production. Designs must account for fabric type adaptation and thread choices from charts like Madeira’s 1431 colors. Test sewouts reveal issues early in the image to embroidery conversion process.
Embroidery design software simulates stitches to preview results. Focus on stitch density and pull compensation to avoid puckering. These basics prevent common mistakes in photo to embroidery pattern creation.
Start with high-contrast images for better raster to vector conversion. Simplify complexity using color reduction algorithms in tools like Hatch Embroidery. This foundation supports formats like PES, DST, or JEF for embroidery machine compatibility.
Stitch Types and Their Uses
Satin stitches create smooth column effects for text and curves (0.4-6mm wide), while fill stitches provide solid coverage (max 50mm regions per Wilcom guidelines). Running stitches outline shapes efficiently. Choose types based on design needs in embroidery digitizing.
| Stitch Type | Best Use | Density Range | Max Width | Example |
|---|---|---|---|---|
| Running | Outlines | 0.5-1 lines/mm | Unlimited | Simple borders |
| Tatami Fill | Large areas | 0.3-0.6 lines/mm | 50mm | Background fills |
| Satin | Borders | 0.4-0.8 lines/mm | 6mm | Lettering edges |
| Steil | Letters | 0.5 lines/mm | 8mm | Monogramming |
| Zigzag | Decoration | 0.4-0.7 lines/mm | 10mm | Curved motifs |
A stitch simulator screenshot shows satin on text with even spacing, tatami filling a leaf shape without gaps. Use auto-digitizing tools for initial paths, then refine manually. This ensures clean convert PNG to PES or JPEG to embroidery file results.
Combine stitches for complex designs like applique designs with running outlines and satin edges. Preview in machine embroidery preview to check stitch count optimization. Experts recommend testing small sections first.
Key Limitations of Embroidery Machines
Most home machines (4×4″ hoop = 100x100mm) can’t handle designs over 360x200mm without rehooping, per Brother PE800 specs. Embroidery hoop size dictates maximum dimensions. Plan design resize accordingly for smooth image embroidery converter output.
- Hoop size: 4×4 to 12×8 inches, limits large logos.
- Needles: 1-15, affects color changes and speed.
- Min/max stitch length: 0.5-12mm, controls detail.
- Pull compensation: 3-6% horizontal, counters fabric shift.
- Density: 0.3-0.8 lines/mm, balances coverage and puckering.
Single-needle machines like Brother PE-Design users trim jumps manually. Multi-needle setups automate color sequence optimization. Always include basting stitches for alignment in production ready designs.
Software like Ink/Stitch handles jump stitches and trims for VP3 or EXP files. Avoid over-resizing to prevent design resize without distortion. Check stitch minimization for efficient home hobbyist tools.
Fabric and Thread Considerations
Stretchy fabrics require 20% looser density (0.4 lines/mm vs 0.6 on cotton) and zigzag underlays to prevent distortion. Match fabric type adaptation to settings in embroidery digitizing. Use Madeira thread color charts with 1431 options for accurate thread color chart matching.
| Fabric Type | Density | Underlay | Needle Size | Stabilizer |
|---|---|---|---|---|
| Cotton Twill | 0.6 lines/mm | Light zigzag | 75/11 | Medium tearaway |
| Fleece | 0.4 lines/mm | Heavy lattice | 90/14 | Water soluble |
| Knits | 0.35 lines/mm | Zigzag | 80/12 | Cutaway |
| Denim | 0.7 lines/mm | None | 100/16 | Tearaway |
| Silk | 0.5 lines/mm | Light running | 70/10 | Soluble topping |
Needle penetration varies by fabric thickness, so test with scraps. Add underlay stitches for stability on knits during photo stitching. This prevents issues in realistic photo embroidery.
Pair threads with high contrast images for logos or portraits. Software like SewWhat-Pro adjusts for needle size. Conduct a test sewout to verify balanced density on your fabric.
Selecting the Right Source Image
Choose images with 4-8 solid colors and bold outlines before starting work in embroidery design software. Professional digitizers often reject customer photos lacking contrast. Focus on embroidery-friendly traits to ensure smooth conversion to formats like PES or DST files.
Start by evaluating the image for high contrast images that highlight shapes clearly. Simple designs translate better to satin stitches or fill stitches in tools like Wilcom software or Embrilliance StitchArtist. This step saves time during digitize images for embroidery.
Consider the final output on fabric, factoring in stitch density and pull compensation. Test with a stitch simulator to preview results. Vector sources outperform raster images for image to embroidery conversion.
Prepare by using remove background techniques for clean edges. Adjust in Adobe Illustrator for embroidery prep or Ink/Stitch free software. This leads to production ready designs compatible with embroidery machines.
Ideal Image Characteristics
High-contrast line art converts cleaner than photos. Target images with strong edges and clear definitions for best results in photo to embroidery pattern processes. Use tools like Photoshop Levels to boost contrast.
Look for 4-8 colors, simple shapes, and minimal gradients. These traits suit auto digitizing tools and manual digitizing alike. Vector or line art works best for scalability.
- 4-8 solid colors match thread color charts easily.
- Strong edges support edge detection and path generation.
- Simple shapes reduce stitch count optimization needs.
- Minimal gradients avoid complex gradient fills.
- Vector or line art preferred for raster to vector conversion.
- 300 DPI minimum ensures sharp details in embroidery file formats.
Examples include cartoon logos or scanned artwork. These prepare well for Hatch Embroidery or SewWhat-Pro, leading to embroidery hoop size compatibility without distortion.
Common Image Pitfalls to Avoid
Avoid JPEG compression artifacts by using PNG or TIFF formats. Blurry customer logos often fail from low-res sources. Switch to higher quality files for logo embroidery digitizing.
Key pitfalls include low resolution, too many colors, complex gradients, and busy backgrounds. Small details under 3mm lose clarity in stitching. Address these before embroidery digitizing.
- Low resolution under 300 DPI: Upscale with caution or rescan; use TIFF for quality.
- Too many colors over 15: Apply color reduction algorithm in GIMP or Illustrator.
- Complex gradients: Simplify image complexity to solid blocks for fill stitches.
- Busy backgrounds: Remove background for PNG transparency handling.
- Small details under 3mm: Enlarge or eliminate; check with design resize tools.
Fixes ensure stitch minimization and balanced density. Test with machine embroidery preview in Brother PE-Design or Janome Artistic Digitizer to avoid common mistakes digitizing.
Image Formats and Resolution Tips
PNG preserves transparency for irregular shapes. Use TIFF for high color depth in portraits to reduce banding. These choices support convert PNG to PES or JPEG to embroidery file workflows.
Select formats based on needs like scalability or quality. SVG excels for vector art preparation, while BMP suits simple bitmap to vector embroidery. Always aim for high resolution sources.
| Format | Pros | Cons | Best For | Resolution Tip |
|---|---|---|---|---|
| PNG | Transparency support | Larger file sizes | Irregular shapes, remove background | 300 DPI minimum |
| SVG | Scalable vectors | Not for photos | SVG to embroidery, bezier curves | Vector, no DPI limit |
| TIFF | High quality, layers | Very large files | Portraits, photo stitching | 300-600 DPI |
| JPEG | Small files | Compression artifacts | Avoid; use only previews | Not recommended |
Pair with image tracing in Inkscape embroidery extension for clean results. This prepares for custom embroidery patterns across PES, DST, EXP, JEF, or VP3 files.
Essential Software and Tools
Choose from professional Wilcom E4 at $4995, mid-range Hatch at $1649, or free Ink/Stitch based on skill level and budget. The software landscape for embroidery digitizers ranges from basic free tools to advanced paid suites. These options support image to embroidery conversion, handling formats like PNG, JPEG, and TIFF.
Free embroidery design software like Ink/Stitch works well for hobbyists converting simple logos or line art. Paid tools offer auto-digitizing features for complex photos, including stitch density control and pull compensation. Start with your needs, such as embroidery machine compatibility for PES, DST, or JEF files.
Consider hardware requirements like GPU acceleration for faster rendering in pro software. Test stitch simulators to preview designs before sewing. Beginners benefit from tools with tutorial videos and step-by-step guides for raster to vector conversion.
Experts recommend matching software to fabric type and hoop size. For photo to embroidery patterns, look for color reduction algorithms and gradient fills. This ensures production-ready designs with optimized stitch counts.
Free vs. Paid Digitizing Software
Free Ink/Stitch handles most hobbyist needs, while Wilcom offers pro features like faster auto-digitizing and high accuracy. Compare these for digitize images for embroidery tasks, from simple PNG to PES conversions. Choose based on your workflow for image embroidery converter functions.
| Software | Price | Auto-Digitize | Learning Curve | Stitch Types | Best For |
|---|---|---|---|---|---|
| Ink/Stitch | Free | Basic | Moderate | Satin, fill, running | Hobbyists |
| Embrilliance Essentials | $149 | Good | Easy | Fill, satin, applique | Home users |
| Wilcom Hatch | $1649 | Advanced | Steep | All types, gradients | Professionals |
Free options excel in manual digitizing for custom patterns, like converting scanned artwork. Paid software provides stitch simulators and underlay stitches for better results on fabrics. Test with high-contrast images for edge detection and path generation.
For convert PNG to PES or JPEG files, paid tools handle PNG transparency and compression artifacts better. Beginners should prioritize easy interfaces, while pros need color sequence optimization. Always check embroidery file formats for your machine.
Popular Options: Wilcom, Embrilliance, Hatch
Wilcom EmbroideryStudio E4.5 excels at photo-realistic portraits with extensive stitch previews, while Embrilliance StitchArtist at $169 suits most home users. These tools support photo stitching and grayscale to embroidery conversions. Pick one for your embroidery digitizing level.
| Software | Price | Key Features | Best For | Rating |
|---|---|---|---|---|
| Wilcom E4.5 | $4995 | Photo stitch, gradient fills | Commercial | 15/10 |
| Hatch Organizer | $299 | Production tools | Organizing | 9/10 |
| Embrilliance StitchArtist | $169 | Manual vector | Home pro | 10/10 |
| PE-Design 11 | $1249 | Brother machines | Brother users | 8/10 |
| Bernina ArtLink | Free | Basic editing | Beginners | 6/10 |
Wilcom handles sequin designs and 3D puff embroidery, ideal for pros. Embrilliance offers font conversion for lettering and monogramming. Use Hatch for design resize without distortion and multi-format exports like EXP or VP3.
Practical tip: Simplify image complexity first, remove backgrounds, then digitize. These support multi-needle machines with jump stitch trimming. Preview with machine embroidery simulators for test sewouts.
Free Alternatives and Mobile Apps
Ink/Stitch extension transforms free Inkscape into a full digitizer rivaling $500 software for basic designs. It excels at SVG to embroidery and auto-tracing embroidery. Great for logo embroidery digitizing or line art.
- Ink/Stitch: Full digitizing with satin, fill, and running stitches.
- Inkscape + EmbroiderModder2: Raster to vector for PES, DST files.
- SewWhat-Pro trial: Editing and stitch optimization.
- Bernina ArtLink: Basic image tracing and format conversion.
Mobile apps like iEmbroider offer limited auto-tracing for quick webcam photo digitizing. Pair with desktop tools for stitch count optimization and thread charts. Ideal for in-the-hoop projects on single-needle machines.
Start with Ink/Stitch for beginner digitizing tutorials, practicing on high-contrast images. Combine with GIMP for color reduction before converting to embroidery patterns. Avoid common mistakes like ignoring stitch density by using previews.
Preparing Your Image for Digitizing
Pre-process images in Photoshop or GIMP to 6 colors max. This step increases stitch success in embroidery digitizing software. Essential editing before software import prevents common failures.
Start with high contrast images for better results in converting to PES file or DST file. Clean up JPEG compression artifacts and handle PNG transparency. These practices simplify the path to embroidery machine compatible designs.
Use tools like Ink/Stitch free software after prep for auto digitizing. Focus on stitch density and pull compensation from the start. This workflow supports Wilcom software or Embrilliance StitchArtist.
Test your prep with a stitch simulator before full digitizing. Adjust for embroidery hoop size and fabric type adaptation. Prepared images lead to smoother photo to embroidery pattern conversion.
Image Editing Basics in Photoshop/GIMP
Use Photoshop Image > Adjustments > Posterize (4-6 levels) to simplify complex photos for embroidery. This reduces details that cause stitching issues. It prepares files for digitize images for embroidery.
Follow these numbered steps for basic editing:
- Apply Levels adjustment to boost contrast.
- Use Posterize with 5 levels for color simplification.
- Perform Selective Color reduction to match thread charts.
- Add Unsharp Mask for edge definition.
- Save as PNG-24 to preserve quality.
These steps work in GIMP too, using similar tools. For example, edit a family portrait to create a photo stitching design. This method aids convert PNG to PES.
Practice on simple logos first. Check results in Hatch Embroidery preview. Consistent editing builds skills for professional embroidery services.
Simplifying Colors and Shapes
Reduce photo colors to match Isacord thread chart limitations using GIMP Colors > Posterize. Limit to 6 colors for clean image to embroidery conversion. This prevents overcrowding in satin stitches and fill stitches.
Follow this 5-step process:
- Analyze color count with software tools.
- Apply Posterize at 5-8 levels.
- Use Color Replace tool for swaps.
- Enhance edges with filters.
- Merge small shapes to reduce complexity.
For a landscape pattern, merge tiny areas into bold fills. This optimizes stitch count for Brother PE-Design. It supports running stitches and applique designs.
Avoid over-simplification that loses detail. Preview in SewWhat-Pro for balance. Simplified shapes improve embroidery file formats like JEF file or VP3 file.
Removing Backgrounds and Noise
Use Photoshop Select > Subject for accurate background removal in image embroidery converter prep. AI tools outperform manual methods for clean edges. This step is key for raster to vector conversion.
Try these three methods:
- Photoshop Select Subject + Refine Edge: Feather 1px, contract 2px.
- GIMP Foreground Select tool: Refine for smooth paths.
- Online tools for quick remove background with free options.
For a pet photo embroidery design, remove noise to focus on the subject. Save as transparent PNG for Janome Artistic Digitizer. This handles PNG transparency well.
Clean up dust or artifacts next. Test in stitch simulator to check edge detection. Prepared images reduce jump stitches in final PES file.
Step-by-Step Digitizing Process
Follow this proven 7-step workflow used by professional digitizers for clean results every time. It covers the complete process from importing an image to creating a stitch-ready design compatible with formats like PES, DST, or EXP files.
Start by loading your PNG or JPEG into embroidery design software such as Embrilliance StitchArtist or Hatch Embroidery. Use auto-digitizing tools for quick raster to vector conversion, then refine manually for precision.
Next, assign stitch types like satin or tatami based on shape and size. Optimize stitch count, add underlay stitches, and simulate the design to check for issues like pull compensation or density problems.
Finish with color sequence optimization, trim settings, and a test sewout. This workflow ensures embroidery machine compatible files for home hobbyists or commercial production, handling everything from logos to photo stitching.
Importing and Auto-Digitizing
Hatch auto-digitizer converts simple logos in 30 seconds versus 45 minutes of manual tracing. Begin the image to embroidery conversion by importing high-contrast PNG or SVG files into your software.
- Import PNG/SVG with transparency handling to remove backgrounds easily.
- Set auto-digitize options like satin borders for edges and tatami fill for larger areas.
- Generate a preview to inspect the auto-tracing embroidery results.
- Adjust 10-20% of objects manually, focusing on complex shapes or JPEG compression artifacts.
- Run stitch count optimization to minimize jumps and balance density.
This approach works well for logo embroidery digitizing or scanned artwork. Software like Wilcom or Ink/Stitch free extension handles edge detection and path generation efficiently.
For best results, simplify image complexity first in tools like GIMP. Preview in a stitch simulator to catch issues before exporting to PES or JEF files.
Manual Vectorization Techniques
Draw bezier curves in Embrilliance with node editing tolerance 0.5px for 100% control over complex logos. Manual digitizing gives precision when auto digitizing tools fall short on intricate designs.
- Use the pen tool to outline shapes accurately from raster images.
- Edit nodes to weld or simplify paths, reducing total nodes.
- Convert stroke to fill for solid areas in your SVG to embroidery workflow.
- Group blocks logically for easier management.
- Optimize paths to under 1000 nodes for smooth stitching.
Apply this in Brother PE-Design or Janome Artistic Digitizer for custom embroidery patterns. It excels at bitmap to vector embroidery, especially for line art or high-resolution TIFF files.
Experts recommend node editing for vector art preparation before embroidery. Test with design resize to ensure no distortion on various hoop sizes.
Assigning Stitch Types and Directions
Apply tatami fill with 80% overlap and 0.5 lines/mm to shapes larger than 10mm; use satin columns for borders under 6mm wide. Match stitch types to design elements for professional results in embroidery digitizing.
- Shapes over 10mm: tatami or fill stitches with 45 degrees angle optimization.
- Under 6mm: satin stitches for clean edges.
- Text: steil or column stitches for sharp letters.
- Outlines: running stitches to save thread.
Include underlay stitches for stability on fabric types, and add pull compensation. Optimize direction to reduce fabric distortion, preferred at 45 degrees angles.
In SewWhat-Pro or CorelDRAW embroidery, preview machine embroidery simulation. Adjust for thread color charts, needle penetration, and formats like VP3 for multi-needle machines.
Optimizing the Design for Stitching
Post-digitizing refinement in embroidery design software ensures smooth stitching. It addresses issues from image to embroidery conversion that cause puckering or thread breaks. Proper optimization creates production-ready designs.
Reduce stitch count through optimization. This step keeps designs within embroidery hoop size limits and boosts production speed. Tools like Wilcom software or Embrilliance StitchArtist make it straightforward.
Focus on stitch density, underlay, and color sequence next. These adjustments adapt the design for fabric type and machine type. Test with a stitch simulator before sewing.
Optimized designs work across embroidery file formats like PES, DST, or JEF. They suit both home hobbyist tools and commercial embroidery production. Always preview in software for best results.
Reducing Stitch Count
Optimize fills to under 4000 stitches. Resize to 80% for 4×4 hoops using Wilcom’s Auto Remove Overlaps. This prevents overload on embroidery machines.
Merge adjacent colors in your digitized file. Increase spacing by 10% on fill areas. Eliminate objects with fewer than 100 stitches to cut unnecessary runs.
- Merge adjacent colors to blend similar shades smoothly.
- Increase spacing 10% for less dense fills without losing shape.
- Delete <100 stitch objects like tiny dots.
- Resize proportionally to fit hoop limits.
- Simplify gradients by reducing color stops.
Use Hatch Embroidery or Ink/Stitch for these steps. Preview the stitch count optimization to confirm low numbers. This keeps convert PNG to PES files efficient.
Underlay and Pull Compensation
Apply zigzag underlay with 2.0mm spacing. Add 4% right pull compensation for knits to stabilize designs. This works well for digitize images for embroidery.
Underlay secures fabric before main stitching. Pull compensation counters thread tension that distorts shapes. Adjust based on fabric type adaptation.
| Fabric | Underlay Type | Pull % | Density |
|---|---|---|---|
| Cotton | Zigzag | 3% | Normal |
| Stretch | Grid | 6% | High |
| Denim | Lattice | 2% | Low |
| Silk | Zigzag | 1% | Normal |
Test settings in Brother PE-Design or Janome Artistic Digitizer. Use a basting box for alignment. These tweaks ensure clean photo to embroidery pattern results on multi-needle machines.
Color Sequence and Trimming
Optimize color order from left to right, top to bottom. This minimizes jump stitches and thread changes. It streamlines embroidery digitizing workflows.
Enable auto color sort in software like SewWhat-Pro. Manually adjust travels for complex designs. Set tie-in and trim to 3mm for clean transitions.
- Use auto color sort for simple patterns.
- Optimize manual travels to reduce jumps.
- Adjust tie-in/trim settings to 3mm length.
- Add a basting box test for registration.
Preview in a machine embroidery preview tool. This cuts downtime on single needle or multi-needle machines. Final designs suit JPEG to embroidery file conversions perfectly.
Testing and Refining the Design
Essential validation prevents costly production errors in image to embroidery conversion. Always preview and test sewout, catches issues before production per digitizer surveys. This step ensures your digitized embroidery design works smoothly on the machine.
Use embroidery design software like Embrilliance StitchArtist or Wilcom to simulate the full process. Check for common problems such as stitch density issues or pull compensation needs early. Refining here saves time and thread waste.
Focus on stitch count optimization and color sequence during tests. Run multiple iterations on scrap fabric matching your production setup. Experts recommend this for production ready designs.
After testing, adjust parameters like underlay stitches or running stitches. Document changes for consistency in future logo embroidery digitizing or custom patterns. This builds reliable workflows for PES, DST, or JEF files.
Previewing Stitchouts
Use Embrilliance 3D preview for realistic stitch simulation to verify densities and gaps before fabric. This tool shows how satin stitches and fill stitches will render in your embroidery machine compatible design. Spot issues like overlapping or sparse areas quickly.
Follow this preview checklist for thorough checks:
- Verify underlays visible for stability on knits.
- Confirm pull compensation prevents gaps in dense fills.
- Review color sequence to minimize jump stitches.
- Ensure total stitches under 8000 for hoop size limits.
- Check design fits embroidery hoop size without distortion.
Resize if needed using design resize without distortion tools in Hatch Embroidery or SewWhat-Pro. For photo to embroidery patterns, simulate on scrap towel textures to predict realism.
Test thread color chart matches in the preview. Adjust stitch simulator settings for fabric type adaptation, like adding puff for 3D effects. This step catches 90% of visual flaws upfront.
Running Test Stitches
Sew test on scrap fabric matching production, add basting box for alignment, adjust density +-10% as needed. Start with slow speed to monitor real-world behavior. This validates your convert PNG to PES or JPEG to embroidery file results.
Follow this 5-step test protocol for best outcomes:
- Match stabilizer and hoop to final project specs.
- Sew at 400 spm to observe thread path clearly.
- Check for gaps or pulling after first pass.
- Measure distortions with a ruler against preview.
- Iterate 1-3 times, tweaking in embroidery digitizing software.
For high contrast images or pet photo embroidery, watch needle penetration on thick fabrics. Use registration marks and trim settings to refine. Brother PE-Design or Janome Artistic Digitizer excel here.
Optimize color sequence optimization if jumps cause issues. Record adjustments for stitch minimization in future runs. This ensures machine embroidery preview translates perfectly to fabric.
Exporting and Machine Formats
Export correct formats like .PES Brother or.DST Tajima matching your machine. Wrong formats can cause embroidery machine errors and failed designs. Format compatibility proves critical for machine success.
After digitizing images in embroidery design software such as Hatch Embroidery or Brother PE-Design, select the output based on your equipment. For example, convert PNG to PES for Brother models. Always preview the stitch simulator before final export to check stitch density and pull compensation.
Test small sections first to avoid issues with hoop size or thread breaks. Use auto digitizing tools for quick photo to embroidery patterns, then refine with manual digitizing for satin stitches or fill stitches. Optimize stitch count to keep designs production ready.
Common pitfalls include ignoring fabric type adaptation or color reduction algorithms. Experts recommend resizing designs without distortion and adding underlay stitches. This ensures smooth transfers from raster to vector embroidery.
Common Embroidery File Types (.PES,.DST, etc.)
.PES (Brother/Babylock), .DST (Tajima/multi),.EXP (Babylock), .JEF (Janome),.VP3 (Pfaff/Husqvarna) represent standard embroidery file formats. Each suits specific machines for seamless image to embroidery conversion. Choose based on your equipment to prevent compatibility problems.
| Format | Brand | Max Colors | Max Stitches | Compression | Notes |
|---|---|---|---|---|---|
| PES v10 | Brother/Babylock | Many | High | Yes | 200x360mm hoop support |
| DST | Tajima/multi | Many | High | No | Universal, simple structure |
| EXP | Babylock | Many | High | Yes | Advanced features |
| JEF | Janome | Many | High | Yes | Custom fonts |
| VP3 | Pfaff/Husqvarna | Many | High | Yes | 3D puff compatible |
Use software like Embrilliance StitchArtist or Wilcom to export these PES file or DST file types. For logo embroidery digitizing, DST works across brands. PES v10 handles complex pet photo embroidery with gradient fills.
Check embroidery hoop size limits in notes, like PES v10’s dimensions. Convert JPEG to embroidery file by reducing colors first. This prepares designs for multi-needle machines or home hobbyist tools.
Transferring to Your Machine
Use USB (FAT32 formatted) for Brother PE-Design or WiFi SD cards for newer Innov-is models. These methods ensure reliable USB design transfer. Match file types like EXP or JEF to avoid read errors.
- Format USB drives to FAT32 for broad compatibility, max 2GB per some machines.
- Employ WiFi like Brother Air for wireless design sending on supported models.
- Insert SD cards directly into machines like Janome or Pfaff.
- Access cloud options such as Hatch Bridge for quick uploads.
Name files in 8.3 format, like DESIGN01.PES, to prevent truncation issues. Test with a machine embroidery preview after transfer. For single needle embroidery, minimize jump stitches.
Beginners should practice with test sewout on scrap fabric. Add basting stitches for alignment on tricky fabrics. This step confirms color sequence optimization and trim settings work as planned.
Troubleshooting Common Issues
Solve most stitching problems through systematic fixes for thread breaks, gaps, and puckering. This section offers rapid fixes for production issues in image to embroidery conversion. Use these steps to create production ready designs with embroidery design software like Wilcom or Embrilliance StitchArtist.
Common errors arise during digitize images for embroidery from photos or logos. Check stitch density and underlay first. Test sewouts reveal issues early in photo to embroidery pattern creation.
For embroidery digitizing, preview designs in stitch simulators. Adjust for fabric type and hoop size. These tweaks ensure smooth runs on machines handling PES, DST, or JEF files.
Experts recommend starting with stitch count optimization and color sequence checks. This prevents downtime in commercial production or home sewing. Follow best practices for convert PNG to PES or similar formats.
Thread Breaks and Gaps
Thread breaks often stem from 0.35mm density too tight or sharp corners; fix by increasing spacing and filleting corners. Gaps appear from insufficient underlay in fill stitches or satin columns. Use embroidery machine preview to spot these before sewing.
| Issue | Cause | Fix | Prevention |
|---|---|---|---|
| Thread Breaks | High stitch density or sharp turns | Increase spacing, smooth corners | Use pull compensation, test on scrap |
| Gaps | Insufficient underlay stitches | Add lattice or zigzag underlay | Match underlay to fabric type |
| Birdnesting | Tension imbalance | Adjust upper/lower tension | Calibrate machine regularly |
In auto digitizing tools like Ink/Stitch, reduce density for running stitches in outlines. For manual digitizing in Hatch Embroidery, edit nodes to avoid tight curves. This keeps convert JPEG to embroidery file smooth.
Prevent issues by simplifying high contrast images first. Remove backgrounds and use edge detection. These steps aid stitch density balance in raster to vector conversion.
Poor Registration Fixes
Design shifting comes from inadequate stabilizer or hoop tension; add centering marks and double stabilizer. Poor registration misaligns layers in multi color embroidery. Check this in embroidery hoop size matching.
Follow these five key fixes for better alignment in image embroidery converter outputs:
- Basting box: Stitch a temporary outline to secure fabric before main design.
- Center marks: Add crosshairs or registration marks in software like Brother PE-Design.
- Hoop tension: Tighten evenly, use proper hoop for fabric type adaptation.
- Stabilizer weight: Layer cutaway or tearaway for heavy designs.
- Design resize check: Scale without distortion, verify stitch count.
For logo embroidery digitizing, use basting stitches in Janome Artistic Digitizer. This holds position during applique designs or 3D puff. Test on similar fabric for best results.
Ink/Stitch free software offers registration marks easily. Combine with machine embroidery preview for confirmation. These ensure production ready designs on single or multi-needle machines.
Advanced Tips and Techniques
Elevate designs with pro techniques used by commercial embroiderers earning $75k/year. These methods turn basic image to embroidery conversions into production-ready files for multi-needle machines. Focus on stitch density optimization and color sequence for flawless results.
Pro digitizers in Wilcom software or Hatch Embroidery use underlay stitches to prevent fabric puckering. They adapt designs for embroidery hoop size and test with stitch simulators. This ensures machine embroidery preview matches the final sewout.
Incorporate registration marks and basting stitches for applique alignment. Optimize jump stitches and trim settings to minimize thread breaks. These steps create production ready designs compatible with PES, DST, and JEF formats.
Experts recommend pull compensation for satin stitches on stretchy fabrics. Use gradient fills in Embrilliance StitchArtist for depth. Practice on high contrast images to master raster to vector conversion.
Creating Realistic Shading Effects
Layer 5 density levels (0.3-0.7 lines/mm) with gradient fills for photo-realistic portraits in Wilcom. Start with grayscale to embroidery conversion to map tones. This builds depth in photo stitching designs.
Apply a 3D puff base under low-density fills for raised shadows. Follow with gradient tatami stitches at varying densities. Use pet photo embroidery as a test subject to refine shading.
Add contour satin stitches along edges for definition. Top with highlight running stitches in metallic threads. Preview in stitch simulator to check needle penetration points.
Adjust stitch count optimization to balance realism and sew time. Test on scrap fabric for fabric type adaptation. This technique shines in portrait digitizing from JPEG images.
3D Puff and Applique Digitizing
3D puff: Low density (0.35mm) running stitch tack-down over foam; applique: 3-step zigzag satin border. These dual techniques add texture to custom embroidery patterns. Use in Ink/Stitch free software or Brother PE-Design.
For 3D puff embroidery, cut foam to shape and place under low density fill. Secure with tack-down runs, then cover with open satin. Include registration marks for precise layering.
In applique designs, add placement stitch outline first. Lay fabric piece, then tack-down with zigzags. Finish with satin border and basting stitches for stability.
Combine both in in-the-hoop projects like logos. Optimize color sequence to reduce jumps. Test sewout ensures embroidery machine compatible results across VP3 and EXP files.
Frequently Asked Questions
How to Convert Images to Embroidery Designs: What is the basic process?
To convert images to embroidery designs, start by selecting a high-contrast image with simple shapes and bold colors. Use embroidery digitizing software like Hatch, Wilcom, or free tools like Ink/Stitch. Import the image, trace outlines manually or auto-trace, assign stitch types (satin, fill, etc.), adjust density and underlay, and generate a stitch file (e.g.,.pes or.dst) for your machine. Test on scrap fabric first.
How to Convert Images to Embroidery Designs: What software should I use for beginners?
For beginners converting images to embroidery designs, try user-friendly options like Embrilliance StitchArtist or Embrilliance Essentials, which offer auto-digitizing features. Free alternatives include Ink/Stitch (Inkscape extension) or SewArt. Professional software like Wilcom Hatch provides advanced control but has a learning curve. Always ensure compatibility with your embroidery machine’s format.
How to Convert Images to Embroidery Designs: Can I do it for free?
Yes, you can convert images to embroidery designs for free using tools like Ink/Stitch in Inkscape, which supports vector tracing and stitch generation, or online converters like EmbroideryDesigns.com’s basic tools. Upload your image, adjust settings, and download the file. Results may need manual tweaks for quality, as free tools lack advanced features of paid software.
How to Convert Images to Embroidery Designs: What image types work best?
The best images for converting to embroidery designs are vector graphics (SVG, EPS) or high-resolution PNG/JPG with high contrast, few colors (under 10), and simple outlines-no photorealistic or gradient-heavy photos. Avoid blurry or complex images; preprocess in Photoshop or GIMP to simplify, increase contrast, and remove backgrounds for optimal stitch results.
How to Convert Images to Embroidery Designs: How do I fix common issues like puckering?
When converting images to embroidery designs, puckering often results from high stitch density or poor underlay. Reduce density (aim for 0.4-0.6mm for fills), add proper underlay stitches, use cutaway stabilizer, and hoop fabric tautly. Test designs at smaller sizes first and adjust pull compensation in your software to prevent gaps or distortions.
How to Convert Images to Embroidery Designs: What’s the difference between auto-digitizing and manual?
Auto-digitizing in tools for converting images to embroidery designs quickly generates stitches from raster images but often produces messy results with excessive jumps and poor density. Manual digitizing gives precise control over stitch paths, angles, and types, yielding professional-quality designs ideal for complex images. Start with auto for simples, refine manually for best outcomes.
(adsbygoogle = window.adsbygoogle || []).push({});