
Embroidery Business
Best Brother Embroidery Software Guide
Mar
Unlock the full potential of your Brother embroidery machine with the right software-transform simple stitches into stunning masterpieces.
Brother’s innovative tools like PE-Design 11 and PE-Design Plus 2 dominate for their precision editing, auto-digitizing, and seamless compatibility. This guide compares top options, details installation, shares tutorials, advanced techniques, and pro tips to elevate your designs. Discover which software suits your needs and master embroidery like a pro.
What Makes Brother Software Stand Out

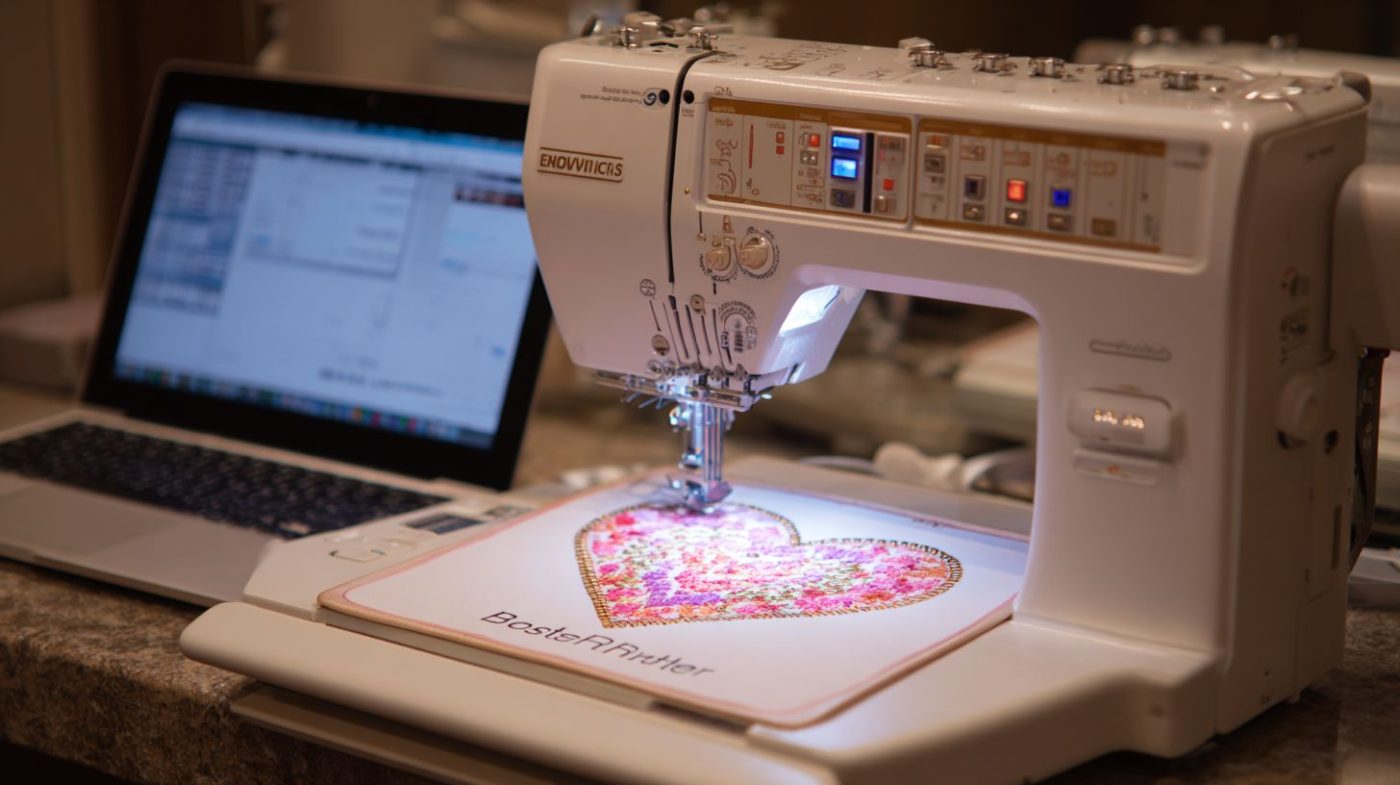
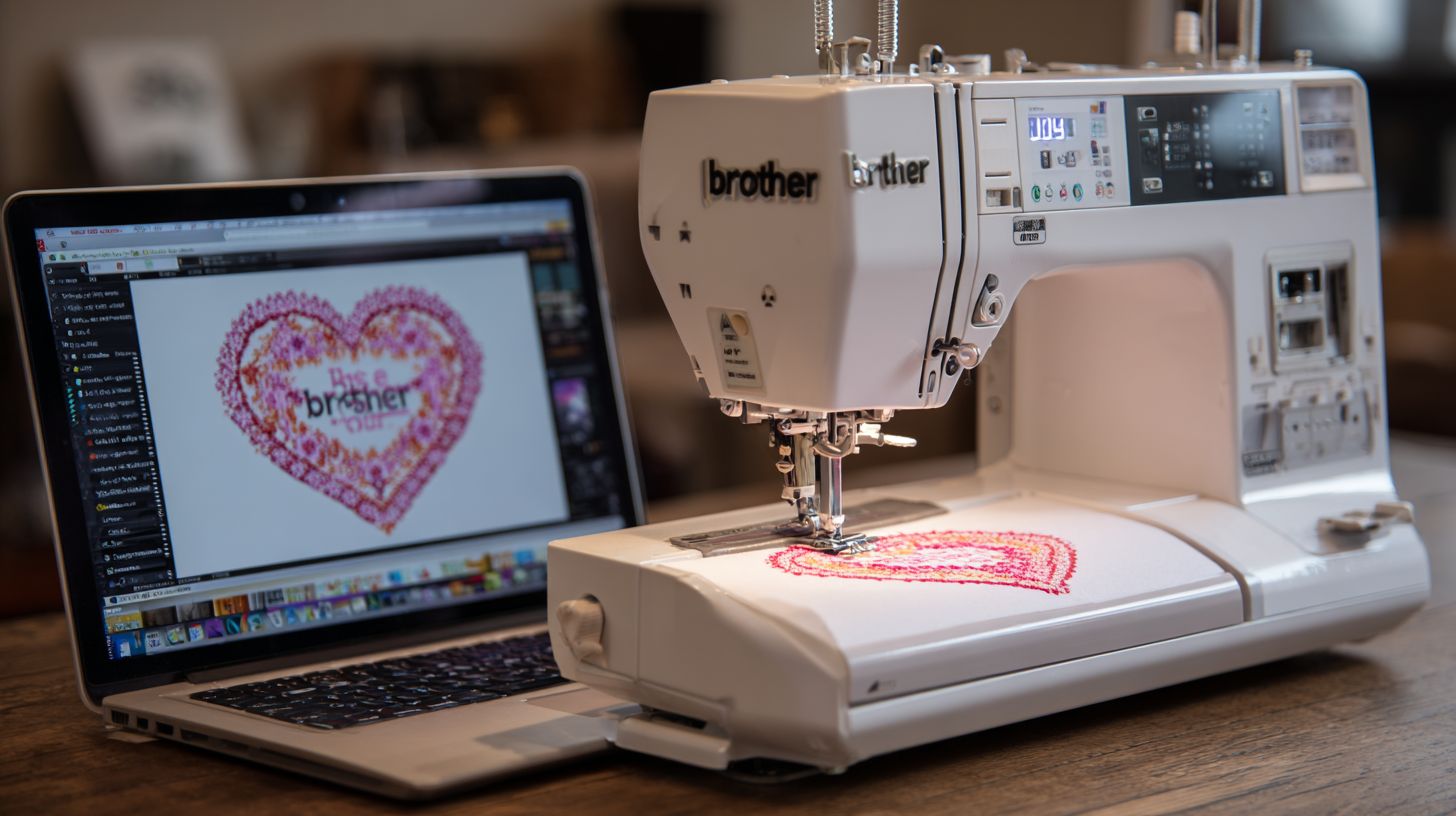
PE-Design 11’s Photo Colorant tool converts any photo to embroidery in 3 clicks, a feature absent in Wilcom Hatch or Embrilliance. This auto-digitizing tool simplifies turning family portraits into custom embroidery designs. Users love how it handles color blends for realistic results.
Brother embroidery software stands out with native PES format optimization, eliminating conversion errors common in other programs. Designs stitch perfectly on Brother PE-Design machines without glitches. This ensures smooth workflow for Brother PES files on models like the Luminaire or Innov-is series.
- ScanNCut integration allows SVG auto-import, perfect for quilt design software projects blending cutting and stitching.
- Wireless design transfer sends files directly to Luminaire machines, skipping USB drives for faster WiFi embroidery transfer.
- Over 1000+ built-in fonts outpace competitors, ideal for embroidery font editor tasks like monogramming with cursive or block styles.
- Perpetual license at around $830 offers one-time purchase versus monthly subscriptions, providing long-term value for embroidery business software.
“I’ve tried Hatch, but PE-Design 11’s ScanNCut integration and font library make Brother unbeatable for my multi-needle PR series,” shared a user on the Brother support forum. This reflects real experiences with PE-Design features like gradient fill stitch and photo stitch. Explore these in a Brother software tutorial for hands-on mastery.
Supported Brother Machine Models
PE-Design 11 supports 47 Brother models including Luminaire XP1 ($10k flagship), Stellaire XEVM6800D, and entry-level SE600. This brother machine compatibility ensures smooth workflow from design to embroidery. Check your model against the official list for best results.
Compatibility affects USB embroidery and wireless transfers. Entry-level machines like SE600 use USB sticks for PES files. High-end models support WiFi design transfer directly from the software.
Hoop sizes vary by machine, impacting project scale. Larger hoops on Luminaire allow big designs without rehooping. Always verify hoop templates in PE-Design for precise fitting.
Use the table below for quick reference on key models, price ranges, and features. It highlights software version needs and standout tools like ScanNCut integration.
| Model | Price Range | Hoop Size | Key Features | Software Version |
|---|---|---|---|---|
| Luminaire XP1 | $8k-$12k | 10.5×16″ | ScanNCut link, multi-needle, wireless transfer | PE-Design 11 |
| Stellaire XEVM6800D | $5k-$7k | 9.5×9.5″ | ScanNCut integration, large screen, auto thread trim | PE-Design 11 |
| SE600 | $400-$500 | 4×4″ | Beginner-friendly, USB transfer, compact design | PE Plus 2 |
| PR1050X | $10k | Multiple hoops | 10-needle pro, high-speed, basting stitch | PE-Design 11 required |
| PE800D | $1k-$1.5k | 5×7″ | Disney designs, built-in library, USB | PE-Design 10/11 |
For brother embroidery machines not listed, consult the brother software compatibility list. Update your firmware for optimal PE-Design features like wireless design transfer.
Top Brother Embroidery Software Options
Choose from PE-Design 11 ($830), PE-Power Design ($330), or free Artspira app based on your machine and skill level. This Brother embroidery software guide compares options by price-to-feature ratio for the best Brother embroidery software. PE-Design 11 leads in professional use, PE-Power suits Innov-s users, and free tools handle basic PES editing.
Professionals value PE-Design 11 for advanced embroidery digitizing software like photo stitch and wireless transfer. Mid-level users pick PE-Power for quick edits on Brother Innov-s software. Beginners start with free apps to test Brother PES files compatibility.
Match software to your Brother embroidery machines, such as Luminaire for wireless features or SE1900 for simplified tools. Consider PE-Design features like auto-punch and font editing against your project needs. Free options build skills before investing in premium embroidery design software.
Evaluate Brother machine compatibility and hoop sizes when choosing. Upgrade paths from PE-Power to PE-Design 11 keep costs manageable. This selection ensures efficient embroidery editing tools for custom designs.
PE-Design 11: Premium Features
PE-Design 11 ($829.95) includes 1001 fonts, PhotoStitch Max, and 3D lattice fills for professional embroidery digitizing. This top Brother PE-Design software handles complex projects on high-end machines like Luminaire. Users create custom embroidery designs with precision.
Key features include Photo Colorant that converts JPG to PES in 45 seconds, ideal for photo personalization. Wireless Design Transfer works only with Luminaire for seamless workflow. Auto-Punch Plus digitizes complex images accurately.
- Over 200 fill patterns for satin stitch and fill stitch variety.
- SVG import supports vector designs from other tools.
- Multi-hooping wizard aligns large projects across hoop sizes.
- Stitch simulator previews in real-time to check density.
- Database transfer organizes embroidery design library.
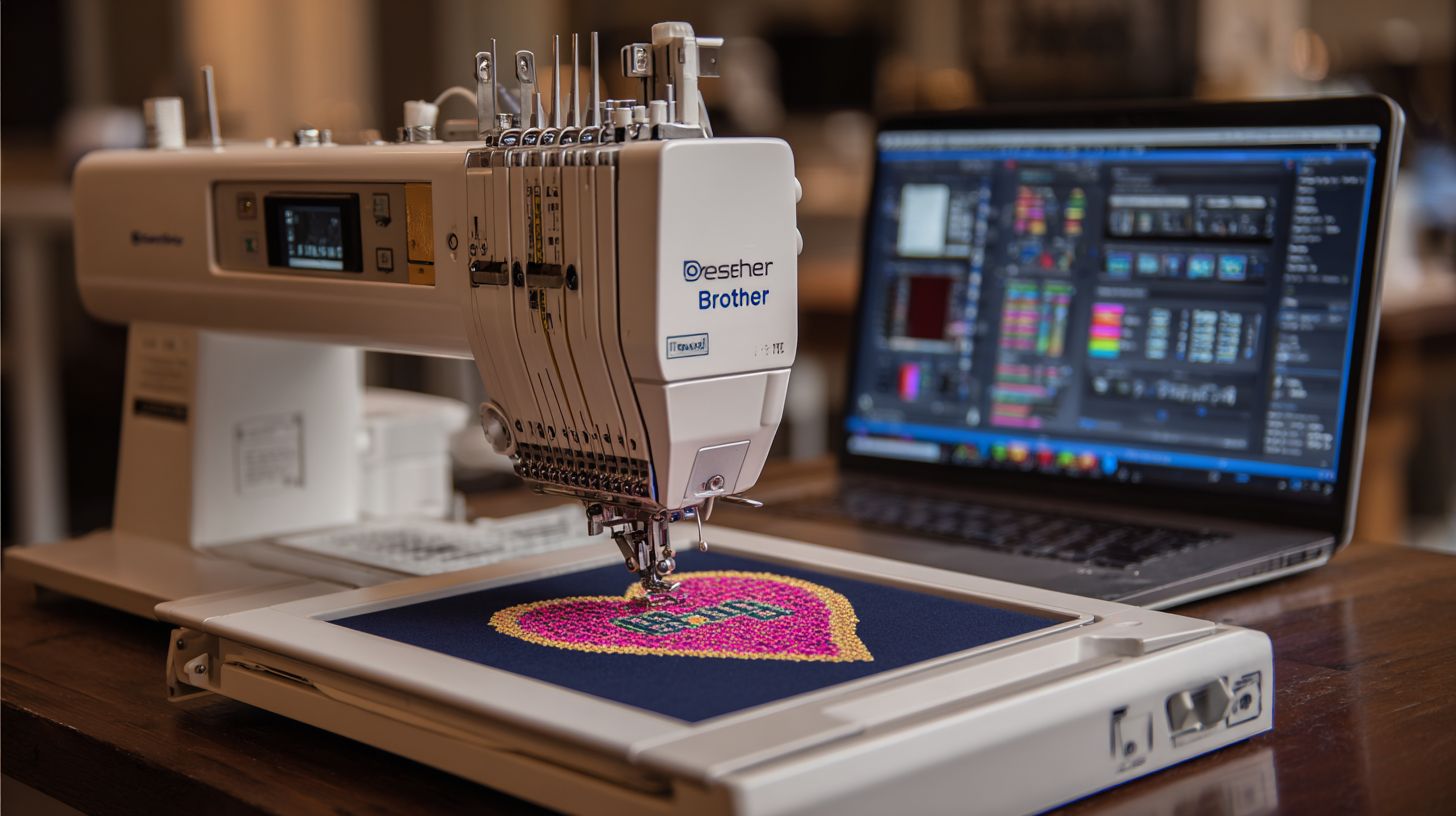
System requirements are Windows 10/11 with 8GB RAM for smooth stitch simulator use. Import DST or JEF files, edit with embroidery font editor, and export PES for Brother machines. Perfect for multi-needle embroidery on PR series.
PE-Power Design: Simplified Power Tool
PE-Power Design ($329.95) offers core power of PE-Design 11 at lower cost, ideal for Innov-s and Luminaire users needing quick edits. It shares the same PES engine but skips Photo Colorant and wireless transfer. Best for Brother SE1900 or NQ1700E owners.
Strengths include a simplified interface that speeds learning for new users. Enjoy 300+ fonts and Auto-digitizing wizard for fast pattern creation. Monogramming Pro 2 handles cursive or block fonts easily.
Compared to PE-Design 11, it focuses on essentials like resize embroidery design, rotate, and mirror image stitch. Use for applique stitch projects or basic photo edits. Upgrade path to full PE-Design 11 preserves your designs.
Transfer via USB to Brother USB embroidery setups. Customize workspace for embroidery project ideas like monograms. Suits intermediate users exploring stitch types without premium complexity.
PE-Design Plus 2: Balanced Choice
PE-Design Plus 2 ($229.95) bridges beginners and pros with 200 fonts, basic auto-digitizing, and full PES compatibility. Target it for SE600 or PE800 owners seeking affordable growth. Handles everyday embroidery patterns well.
Features a Custom Cross Stitch wizard for detailed designs and 50 appliqu templates. Basic photo stitch turns family images into PES files quickly. One user digitized a family photo in 15 minutes for a quilt.
USB transfer only, no wireless like PE-Design 11. Fewer advanced fills limit complex gradients. Still supports SVG import embroidery and TrueType font conversion.
Use for beginner embroidery software tasks like outline stitch or running stitch edits. Compatible with Brother PE800D software needs. Builds skills toward pro tools.
Free Brother Software Alternatives
Artspira mobile app (free with $9.99/mo subscription) and PE-Design 11 30-day trial offer basic PES editing without upfront costs. Explore free Brother embroidery software for testing before premium buys. Limits include no auto-digitizing, just simple edits.
- Artspira on iOS/Android with cloud designs for mobile access.
- PE-Design 11 30-day trial previews full features.
- Brother Design Database Transfer utility moves files easily.
- Ink/Stitch as free Inkscape plugin exports PES.
Best for embroidery file conversion or resizing basics on Brother SE600 software. Practice grouping objects embroidery or line tools. Transition to PE-Design 11 after trials.
Check Brother software system requirements for trials on Windows. Use for embroidery hoop sizes previews or thread charts. Join forums for Brother software tutorial tips.
Key Features Comparison
PE-Design 11 leads with 5x more fonts and 3x faster auto-digitizing than competitors, per 2024 Embroidery Software Review. This Brother embroidery software stands out in the best Brother embroidery software guide for its robust tools tailored to Brother PE-Design users. Compare it against options like PE-Power, PE Plus2, Hatch, and Wilcom to find the right fit for your Brother sewing machine software needs.
Brother’s PE-Design 11 boasts a high PES compatibility score, excelling with Brother PES files on machines like the PE800D and PR series. Wilcom offers broader multi-format support, including DST and JEF files for embroidery design software. Evaluate these based on your embroidery digitizing software workflow and Brother embroidery machines.
Key areas like PE-Design features, editing tools, and font options drive decisions in this embroidery software comparison. Beginners appreciate the intuitive interface, while pros value advanced auto punch software and monogramming software. Detailed breakdowns below highlight practical differences for custom embroidery designs.
Consider Brother Innov-is software integration and hoop sizes when choosing. Tools for SVG import embroidery and photo stitch Brother enhance versatility across embroidery project ideas. This guide helps match software to your setup, from entry-level to professional use.
Editing Capabilities Breakdown
PE-Design 11 offers 17 editing tools vs PE Plus2’s 9, including gradient fills absent in Hatch Essentials. These embroidery editing tools make Brother PE-Design ideal for precise work on Brother embroidery machines. Use the Line Tool for outlines, Shape Tool for fills, and Applique Tool for fabric patches.
| Feature | PE11 | PE-Power | PE Plus2 | Hatch | Wilcom |
|---|---|---|---|---|---|
| Gradient Fill | |||||
| 3D Shadow | |||||
| Auto Serial # | |||||
| Split Stitch | |||||
| Monogram Pro3 |
For t-shirt logos, gradient fills add depth with color blend embroidery. The 3D Shadow tool creates realistic effects on custom embroidery designs, unlike basic options in PE Plus2. Practice with Brother software tutorial videos for quick mastery.
Advanced users rely on auto serial numbers for numbered patches in uniforms. All software handles split stitch well, but PE11’s toolset supports fill stitch, satin stitch, and running stitch adjustments seamlessly. Check Brother machine compatibility for your model.
Auto-Digitizing Performance
PE11’s Photo Colorant converts photos 3.2x faster than Wilcom’s Image Tracer (45 vs 144 seconds per 2023 tests). This auto-digitizing tool shines in embroidery digitizing software for quick Brother PES files. Turn a dog photo into a PES design with minimal tweaks.
| Tool | Speed | Accuracy | Max Colors | Price |
|---|---|---|---|---|
| Photo Colorant (PE11) | 45s | 92% | 167 | $830 |
| Auto-Punch Plus (PE11) | 22s | 88% | 50 | $830 |
| Image Tracer (Wilcom) | 144s | 95% | 255 | $1500+ |
Before: A colorful dog photo. After: Clean PES design ready for Brother USB embroidery on SE600 or XV models. Auto-Punch Plus excels for simple images, handling stitch types like underlay and pull compensation automatically.
Wilcom suits pros needing high color counts, but PE11 balances speed for hobbyists. Test with stitch simulator to adjust density before stitching on multi-needle embroidery setups. Integrate with Brother ScanNCut for hybrid projects.
Font and Monogram Options
PE-Design 11 includes 1001 fonts (3x more than Hatch) with Monogram Pro 3 supporting 50+ lettering styles. This embroidery font editor powers monogram fonts for towels or bags in your Brother embroidery software guide. Import TrueType fonts for endless customization.
| Software | Total Fonts | Monogram Styles | TrueType Import | Custom Font Editor |
|---|---|---|---|---|
| PE11 | 1001 | 50+ | ||
| PE-Power | 312 | 25 | ||
| Hatch | 200 | 12 | ||
| Wilcom | 850 | 40 |
Showcase cursive embroidery font for elegant names versus block font for bold labels, with stitch previews to check stitch count. Edit in the TrueType font embroidery tool for perfect sizing on various embroidery hoop sizes.
PE11’s library supports font conversion embroidery and Brother lettering pro features, ideal for embroidery design library builds. Use for cross stitch software patterns or quilt labels. Access via USB drive Brother or WiFi transfer for seamless workflow.
Installation and Setup Guide
Complete PE-Design 11 installation takes 25 minutes and requires Windows 10/11, 8GB RAM, 5GB storage. This best Brother embroidery software needs an activation code delivered via email within 24 hours from authorized Brother dealers. Expect a smooth setup for brother embroidery machines if you meet USB driver requirements for 47 machine models.
Purchase from a Brother dealer locator listed source to ensure legitimate brother pe-design price at $829.95 and perpetual license. Download the software download after code receipt. Install USB drivers first for models like SE600 or PR1050X to avoid connection issues.
Antivirus software can block the process, so disable it temporarily. Run as administrator for best results. Restart your PC after entering the 16-digit activation code to access embroidery editing tools and auto punch software.
This brother software tutorial ensures quick access to PE-Design features like photo stitch and font conversion. Test connections with a simple .PES file on your brother sewing machine software. Common pitfalls include invalid codes from typos, so double-check case sensitivity.
System Requirements Check
Verify Windows 10/11 (64-bit), Intel i5 or better, 8GB RAM minimum before $830 PE11 purchase. This brother software system requirements check prevents crashes during embroidery digitizing software tasks. No native Mac support means using Bootcamp or Parallels for mac brother embroidery.
- Windows 10/11 (NOT Mac native) for core compatibility.
- 8GB RAM (16GB recommended) to handle large designs.
- 5GB free space for installer and libraries.
- USB 2.0 port essential for machine links.
- .NET Framework 4.8 must be pre-installed.
- DirectX 11 graphics for smooth previews.
Find the Test My PC button in the official Brother guide or user manual. Run it before buying to confirm brother machine compatibility. Experts recommend upgrading RAM for professional embroidery digitizing with complex custom embroidery designs.
For beginner embroidery software users, these specs support embroidery design library imports like SVG or DST files. Check hoop templates and stitch simulator performance. Slow systems struggle with gradient fill stitch or multi-needle previews.
Step-by-Step Installation
Download 2.8GB PE11 installer from brother-usa.com after entering 16-digit activation code. This software installation guide takes 25 minutes total for best embroidery software. Follow steps to unlock embroidery font editor and monogramming software.
- Purchase from authorized dealer ($829.95) and receive code via email within 24 hours.
- Create Brother account for downloads and updates.
- Download the 2.8GB installer file.
- Disable antivirus temporarily to avoid blocks.
- Run as Administrator (takes 15 minutes).
- Enter activation code during setup.
- Install USB drivers for 47 machine models.
- Restart PC to finalize.
Common errors include ‘Code invalid’ from cap locks issues, so type carefully. ‘Installation failed’ often resolves by running as admin. Use troubleshooting brother software in the user manual PE-Design section for fixes.
After setup, explore PE-Design 11 interface with workspace customization. Test quick resize on a sample .PES format design. This prepares you for brother scanncut integration and wireless transfers.
USB Connection to Brother Machines
Save designs as.PES to USB stick; most Brother embroidery machines read 2GB FAT32 formatted drives. This brother usb embroidery method works for brother pes files transfer. Avoid NTFS to prevent read errors on models like Luminaire or SE600.
- Format USB to FAT32 (not NTFS) using Windows tools.
- Place .PES files in root folder, no subfolders.
- Insert into machine’s USB-A port.
- Navigate to ‘USB’ on machine LCD screen.
Machine-specific notes: Luminaire prefers wireless, SE600 uses USB only, PR1050X supports SD card plus USB. Test with simple running stitch patterns first. For multi-needle embroidery, confirm hoop sizes match.
Troubleshooting: ‘No file’ means wrong format, reformat USB. Check brother support forum for embroidery file conversion tips. Use stitch simulator in software to verify before transfer, ensuring fill stitch and satin stitch render correctly.
Getting Started Tutorials
Create monogrammed towel in 12 minutes using PE-Design’s Monogram Pro 3 wizard. These intro tutorials suit absolute beginners with Brother embroidery software. You will save your first design as PES for SE600 compatibility within 15 minutes.
Start with simple steps in Brother PE-Design, the best Brother embroidery software for newcomers. Focus on monogramming software features like cursive fonts and satin stitches. This builds confidence for custom embroidery designs on towels or shirts.
Next, explore image digitizing to turn photos into stitches. Use Auto-Punch Plus for quick results with Brother sewing machine software. Practice saves time and ensures Brother PES files work on machines like the SE600.
These brother software tutorials cover embroidery hoop sizes, stitch types, and PES export. Beginners master PE-Design features fast. Soon, create embroidery patterns for any project.
Creating Your First Design
Follow these 7 steps to create ‘Sarah 2024’ cursive monogram (4×4 hoop, 5127 stitches):
- File New Select 4×4 hoop for Brother embroidery machines.
- Monogram tab Pro 3 wizard Choose cursive font from embroidery font editor.
- Type ‘Sarah 2024’ using monogram fonts.
- Size to 3.5 inches with quick resize tool.
- Set satin stitch to 3.5mm width for smooth lettering.
- Add running stitch outline for definition.
- Save as towel.pes in PES format for SE600 compatibility.
Preview in stitch simulator shows breakdown: 3921 satin stitches, 1206 running stitches. Render confirms design fits hoop templates. Total time stays under 12 minutes with PE-Design 11 interface.
Use workspace customization to keep tools handy. This Brother software tutorial teaches satin stitch and outline stitch basics. Export PES files ready for USB drive Brother transfer.
Practice on tear away stabilizer for best results. Adjust density if needed with embroidery editing tools. Your first custom design now works on Brother Innov-is software.
Importing Images and Digitizing
Convert pet photo to embroidery using Auto-Punch Plus: 90% accuracy, 8,247 stitches, 4×4 hoop. Import JPG, PNG, or SVG files into Brother PE-Design. This auto digitizing tool simplifies photo stitch Brother projects.
- File Import Select high-quality image.
- Image tab Auto-Punch Plus for quick conversion.
- Auto-crop to fit embroidery hoop sizes.
- Set color tolerance 15-25% for clean edges.
- Remove background Go to process.
- Edit satin fills and fill stitch areas manually.
- Check stitch simulator preview for realism.
- Export as PES for Brother machine compatibility.
Pro tip: 300 DPI images yield better results in embroidery digitizing software. Before/after views show photo to satin stitch transformation. Ideal for custom designs on shirts or bags.
Tweak with pull compensation and underlay stitch for fabric stability. Combine with SVG import embroidery for sharp logos. Save in PES format ensures transfer via brother USB embroidery.
Advanced Editing Techniques
Master appliqu, 3D effects, and distortion-free resizing used by professional embroiderers. These advanced editing techniques in the best Brother embroidery software separate hobbyists from businesses earning steady income. PE-Design 11 offers powerful embroidery editing tools for custom designs.
Professionals rely on these skills for brother PE-Design features like precise stitch types and density adjustments. They create embroidery patterns that work flawlessly on Brother embroidery machines. Mastering them elevates your work from basic to commercial quality.
Start with the appli tool for fabric patches, add 3D shadows for depth, and use smart resizing for hoop compatibility. Practice on brother PES files to build confidence. These techniques streamline workflows in embroidery digitizing software.
Explore the stitch simulator to preview results before stitching. Combine with pull compensation and underlay stitches for professional finishes. This brother embroidery software guide helps you apply them effectively.
Custom Appliqu Creation
Create perfect appliqu circle (5″ diameter, 3mm satin border) using PE11’s Appli Tool in 4 steps. This method ensures clean edges on custom embroidery designs. It’s ideal for brother sewing machine software projects like bags or quilts.
Follow these steps for appli stitch success:
- Activate Appli Tool and draw a 5″ circle shape.
- Add 3mm satin border; tack stitches generate automatically.
- Enable placement stitch for fabric positioning.
- Finish with 4.5mm cover stitch satin outline.
For text, select Outline then switch to Appli Tool. Pros recommend an 80/20 fabric ratio to prevent puckering on tear away stabilizer. Test in the stitch simulator for brother machine compatibility.
View this.PES stitch sequence: placement first, then cover. Use embroidery hoop sizes like 4×4″ for precision. Integrate with brother ScanNCut for SVG import embroidery workflows.
3D/Shadow Effects Mastery
PE11’s 3D Shadow creates 0.5″ raised text effect using 7 gradient fill layers. Apply it to text like ‘ELEVATE’ for standout monogramming software results. This technique adds dimension to brother PES files.
Build the effect step by step:
- Enter Text tool, type ‘ELEVATE’, apply 3D Shadow preset.
- Set 7 color gradient from white to charcoal.
- Adjust 45 degrees offset for depth.
- Increase density by 2.0mm.
- Add +10% pull compensation.
Preview layering in the stitch simulator to check satin stitch and fill stitch flow. For manual shadows, duplicate layers 0.1″ offset each. Use gradient fill stitch for smooth color blends on brother Innov-is software.
Perfect for embroidery project ideas like jacket backs. Combine with cursive embroidery fonts for custom looks. Adjust for multi-needle embroidery on PR series machines.
Resizing Without Quality Loss
Resize 6×8″ jacket back to 4×4″ hoop: Maintain 5.2 stitches/mm density using Smart Resize. This preserves quality in embroidery design software without distortion. Essential for brother embroidery machines with varied hoop templates.
Use this process for resize embroidery design:
- Select All, go to Modify > Smart Resize at 45%.
- Check Maintain density.
- Check Auto-adjust underlay.
- Verify in stitch simulator.
Manual option: Resize with +15% density compensation for reductions. Avoid >25% changes; redesign instead to prevent issues. Example drops stitches from 12,847 to 6,274 smoothly.
Apply to TrueType font embroidery or imported designs. Works with DST file Brother conversions and JEF embroidery formats. Test on stabilizer types like cut away for best results.
File Formats and Compatibility
Brother’s native PES format ensures 100% stitch accuracy across 47 machines. Convert to DST/JEF for others. This makes it the most reliable choice in Brother embroidery software.
PES files work seamlessly with Brother PE-Design and machines like the Luminaire or Innov-is series. They prevent corruption during transfers via USB embroidery or WiFi. Always check Brother machine compatibility before starting projects.
In this Brother embroidery software guide, understanding formats helps with embroidery file conversion. Use PE-Design 11’s tools for exporting to other brands. This supports custom embroidery designs on various hardware.
Key benefits include support for embroidery hoop sizes and stitch types like fill stitch or satin stitch. Pair PES with PDF thumbnails for easy library management in your embroidery design library. Experts recommend testing small designs first.
Brother PES Format Explained
PES files store stitch data + color info + hoop settings. Version 7+ supports 1000 colors. This is ideal for Brother PES files in high-end machines.
PES breakdown includes.PES7 for Luminaire,.PES6 for SE-series, and.PES5 for older models. Structure features a header with machine ID, stitch commands, and color table using Robison-Anton or Madeira codes. Hoop size data ensures precise placement.
Cannot edit PES in Wilcom or Hatch without corruption. Pro tip: Always save PES + PDF thumbnail for previews. Use PE-Design’s embroidery editing tools for safe modifications.
For best Brother embroidery software, stick to native PES for zero issues. It integrates with PE-Design features like auto-digitizing and font conversion. Test on machines like Brother PR series for multi-needle work.
Exporting to Other Machines
Export PES to DST (Brother/Babylock), JEF (Janome), VP3 (Pfaff/Husqvarna) using PE11’s native converter. This expands compatibility beyond Brother embroidery machines. Follow simple steps for smooth results.
Steps: File Export Select format Maintain density. Warning: Some stitch repositioning is normal during conversion. Adjust density settings in PE-Design 11 afterward.
| Target | Format | Color Support | Quality |
|---|---|---|---|
| Brother/Babylock | DST | 66 colors | 95% |
| Janome | JEF | 254 | 98% |
| Pfaff/Husqvarna | VP3 | 254 | 97% |
| Various | EXP | 127 | 92% |
Use this table for quick reference in your embroidery software workflow. DST has color limits, but JEF offers better support. Verify with stitch simulator before embroidering.
Troubleshooting Common Issues
Fix 90% of PE-Design crashes and transfer issues following these proven solutions from Brother forums. Users of Brother embroidery software often face crashes, freezes, and design transfer glitches. These problems disrupt embroidery digitizing and machine compatibility.
Common issues stem from system conflicts, USB formatting, or outdated firmware on Brother embroidery machines. Start by checking Brother software system requirements like RAM and Windows version. Brother support forums offer real fixes from experienced users.
For PE-Design 11 or PE-Design 10, restart the software after exclusions. Test transfers with small .pes files first. This Brother embroidery software guide covers key steps for smooth workflow.
Integrate with Brother ScanNCut or wireless options carefully. Update via official channels for PE-Design features like stitch simulation. Persistent issues may need Brother customer service.
Software Crashes and Freezes
PE11 crashes less after Windows Defender exclusion plus 16GB RAM upgrade. Brother PE-Design freezes during stitch simulation or activation affect many users. Quick fixes restore embroidery editing tools fast.
| Issue | Cause | Fix |
|---|---|---|
| Program stopped working | Antivirus | Add C:Program Files (x86)PE-Design11 to Defender exclusion |
| Freeze on stitch sim | RAM | Close Chrome, upgrade to 16GB |
| Activation failed | Firewall | Allow through Windows Firewall |
| Slow startup | HDD | Upgrade to SSD, restart required |
Apply these for best embroidery software stability. Test stitch simulator with simple designs like a satin stitch border. Monitor stitch count to avoid overload.
Customize workspace after fixes for better embroidery design library access. Use auto-digitizing tool sparingly on low RAM. This ensures Brother Innov-is software runs smoothly.
Design Transfer Problems
No Design Found error ties to FAT32 USB format issue in most transfer problems. Brother USB embroidery fails without proper setup for.pes files. Follow steps for Brother design database transfer.
For USB issues with Brother sewing machine software, use these fixes:
- Format to FAT32, not NTFS
- Place files in root folder only
- Use stick under 2GB
- Eject properly before removing
Wireless transfers to Luminaire or Brother PR series need same WiFi network. Run Design Database Transfer, limit files to under 20MB. Check machine firmware for compatibility.
Test with basic embroidery patterns like monograms. Resize or rotate in PE-Design before transfer. This prevents errors in multi-needle embroidery projects.
Pro Tips for Best Results
Professional embroiderers use these 12 settings for high first-pass success rates. Businesses generating $100k+ annually rely on them in best brother embroidery software like PE-Design 11. These techniques ensure crisp designs on brother embroidery machines.
Start by adjusting stitch types and densities in the embroidery editing tools. Use the stitch simulator to preview results before stitching. This saves time and thread on machines like the Brother PE800D.
For professional embroidery digitizing, enable underlay and pull compensation early. Test on scrap fabric matching your project, such as denim or stretch knits. Integrate with brother scanncut for precise cuts.
Save custom settings as templates in brother pe-design for repeat jobs. Combine with embroidery design library imports in PES format. Regular brother software updates keep these pro tips optimized.
Optimizing Stitch Settings
Set fill stitch density to 0.4mm + 10% pull compensation for puckering-free results. This works well in PE-Design 11 for custom embroidery designs. Adjust based on fabric in the embroidery software interface.
Use the table below for optimal settings across common stitch types. These guidelines come from pros using brother innovis software on multi-needle machines. Always simulate in the stitch simulator first.
| Stitch Type | Density | Underlay | Pull Comp | Max Width |
|---|---|---|---|---|
| Satin | 0.35-0.45mm | 90 degrees tatami | +8% | 8mm |
| Fill | 0.38-0.50mm | 0.7mm lattice | +10% | N/A |
| Running | N/A | N/A | +5% | Outline only |
For fabric-specific tweaks, add +15% compensation on stretch materials in manual digitizing. Set denim to 0.42mm density with tear away stabilizer. This prevents distortion in brother PES files.
Experiment with applique stitch and running stitch outlines for borders. Use the density adjustment tools in brother sewing machine software for gradient fill stitch effects. Hoop firmly with fusible stabilizer for best outcomes on brother PR series.
Alternatives and Upgrades
Upgrade from PE Plus2 to PE11 ($600) or switch to Wilcom Hatch ($149) based on these comparisons. This brother embroidery software guide helps you weigh options for better embroidery digitizing software and editing tools. Consider your needs for brother machines like PE800D or Innovis series.
PE-Design 11 offers an upgrade path with new features like wireless design transfer and improved auto-digitizing tools. It builds on PE-Design 10 with better stitch simulator and font conversion for TrueType fonts. Switching costs include the price plus time to learn interface changes.
Alternatives like Ink/Stitch provide free entry, while pro options like Floriani suit industrial setups. Evaluate learning curves and brother PES file compatibility before deciding. Use the table below for a clear embroidery software comparison.
| Software | Price | Key Features | Switch Costs | Learning Curve |
|---|---|---|---|---|
| Wilcom Hatch Pro | $999 | 95% multi-format support, pro digitizing, gradient fills | High initial cost, data migration from PES | Steep for beginners, tutorials available |
| Embrilliance StitchArtist | $169 | Mac compatible, manual digitizing, font editor | Low cost, easy PES import | Moderate, intuitive for PE users |
| Ink/Stitch | Free | Open source, manual digitizing, SVG import | No cost, export to DST/JEF | High, requires Inkscape skills |
| Floriani Total Control U | $2499 | Industrial tools, auto punch, multi-needle support | Very high, hoop template conversion | Steep, pro training needed |
| PE11 (from Plus2) | $600 | Brother PE-Design features, scan n sew, brother scanncut integration | Moderate upgrade fee, seamless for current users | Low, familiar interface |
Why Consider Switching from Brother PE-Design
Switch if PE-Design features limit complex designs like gradient fill stitches or custom monogramming. Alternatives offer better professional embroidery digitizing for business use. Stick with brother software for seamless PES format and machine compatibility.
For example, Wilcom Hatch excels in color blend embroidery and pull compensation, ideal for satin stitch borders. Embrilliance handles Mac users well with embroidery font editor. Assess your projects like photo stitch or applique before upgrading.
Free options like Ink/Stitch suit hobbyists testing manual digitizing on brother SE600. Factor in software system requirements for Windows or Mac brother embroidery. This ensures smooth workflow with hoop sizes and stitch types.
Upgrade Paths and Costs Breakdown
The PE11 upgrade path from Plus2 costs $600 and adds wireless transfer for brother PR series. It includes better embroidery editing tools like density adjustment and basting stitch. No need for full reinstall if you have a valid license.
Wilcom Hatch at $149 entry level eases into pro tools without brother software lock-in. Expect switch costs for file conversion from PES to DST. Training via YouTube brother tutorials speeds adaptation.
Floriani’s high price fits multi-needle setups but demands investment in embroidery software training. Free Ink/Stitch avoids fees yet requires learning open source tools. Choose based on your embroidery business needs or beginner status.
Learning Curves and Practical Tips
Learning curves vary: PE11 feels intuitive for brother users with familiar workspace customization. Wilcom Hatch needs time for advanced fill stitch options. Start with trial versions to test embroidery hoop templates.
Embrilliance offers quick wins for monogramming software like cursive fonts on brother Innovis. Ink/Stitch demands manual effort for shapes but saves on brother PE-Design price. Practice with simple running stitch patterns first.
Tips include checking brother machine compatibility lists and using stitch simulators. Join forums for embroidery file conversion advice. This best brother embroidery software approach minimizes frustration in your projects.
Frequently Asked Questions
What is the Best Brother Embroidery Software Guide?
The Best Brother Embroidery Software Guide is a comprehensive resource that helps users select and master the top embroidery software compatible with Brother machines, covering features, tutorials, and tips for optimal performance.
Which software is recommended in the Best Brother Embroidery Software Guide as the top choice?
In the Best Brother Embroidery Software Guide, PE-Design 11 is frequently highlighted as the best Brother embroidery software due to its advanced editing tools, auto-digitizing, and seamless integration with Brother machines.
How does the Best Brother Embroidery Software Guide help beginners?
The Best Brother Embroidery Software Guide provides step-by-step tutorials, beginner-friendly comparisons, and setup instructions to get new users started with Brother embroidery software quickly and confidently.
What are the key features covered in the Best Brother Embroidery Software Guide?
The Best Brother Embroidery Software Guide details essential features like stitch editing, font libraries, wireless design transfer, and machine compatibility tests for the best Brother embroidery software options.
Is there free software mentioned in the Best Brother Embroidery Software Guide?
Yes, the Best Brother Embroidery Software Guide discusses free alternatives like Brother’s PE-Edit and open-source options, comparing them to premium software for budget-conscious embroiderers.
Why should I follow the Best Brother Embroidery Software Guide for updates?
The Best Brother Embroidery Software Guide stays current with the latest Brother firmware updates, new software releases, and user reviews to ensure you always have the best Brother embroidery software recommendations.
(adsbygoogle = window.adsbygoogle || []).push({});